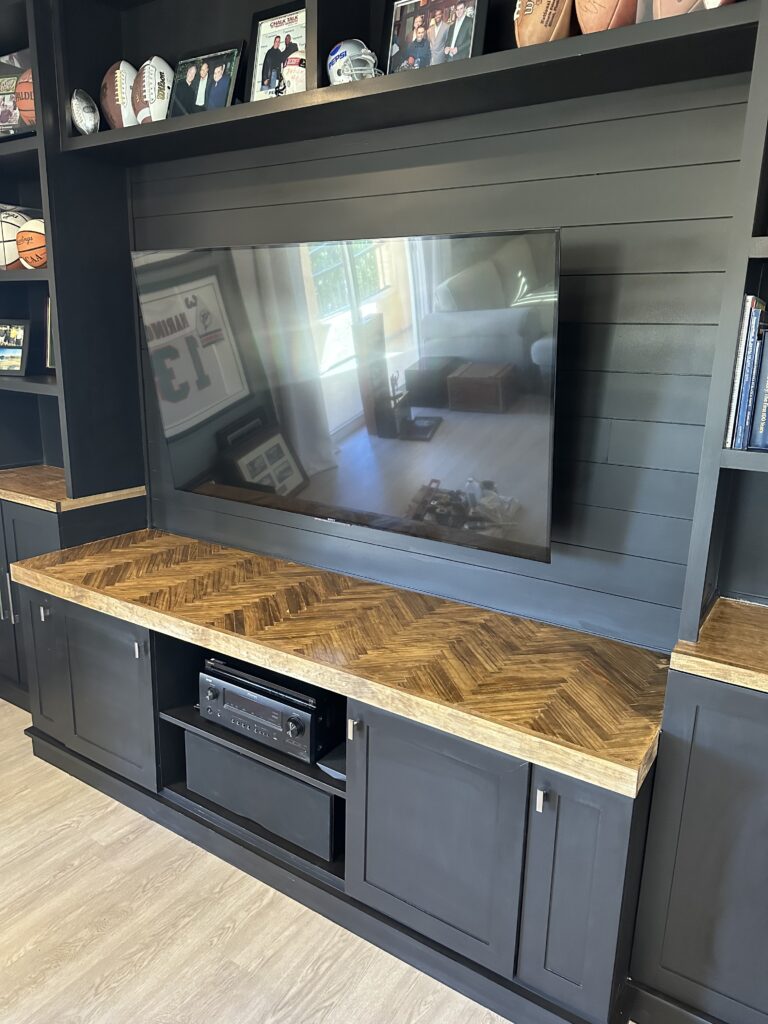
This herringbone countertop is very easy to make and looks so beautiful!
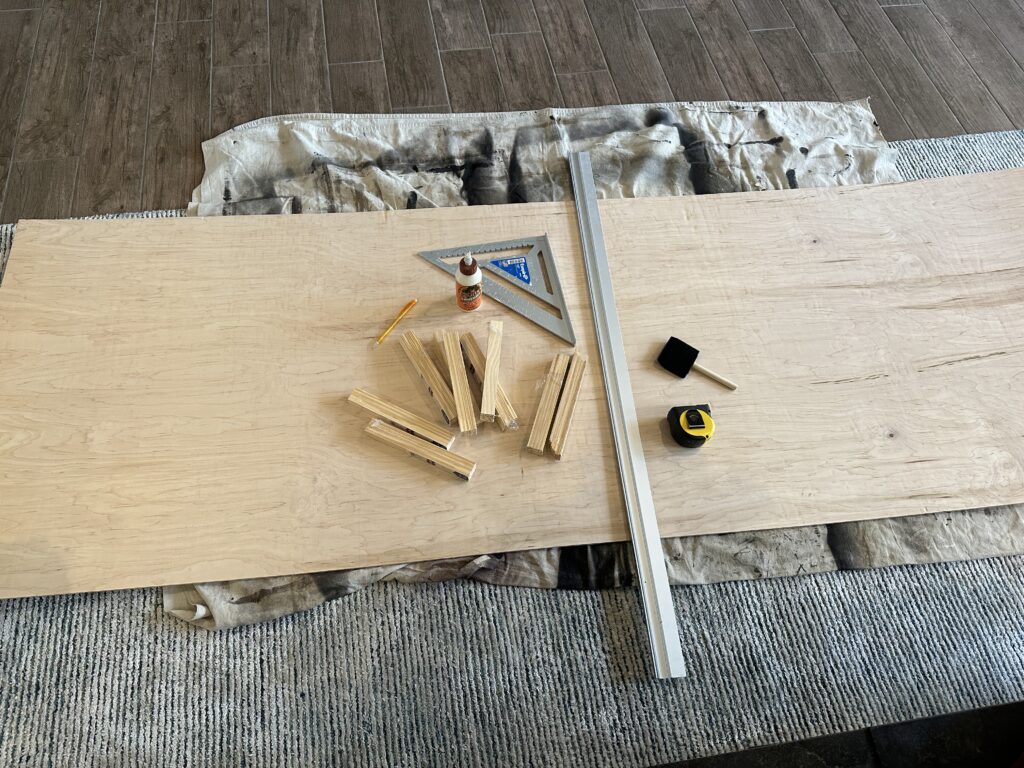
Gather your supplies
The cabinet I was putting this on already had a solid base so I didn’t a very thick base. I used a 1/4 in. piece of plywood that was cut slightly larger than the space I needed to cover. You will also need a lot of paint sticks that have been cut down (check out the end of this post to see how I did it), a straight edge, a speed square, a measuring tape and wood glue. I started off using the foam brush but quickly decided I didn’t need it. (Later on you will need a sander, circular saw, a nail gun and some clamps if you have them.) You will also need a stain and polyurethane top coat.
Getting started
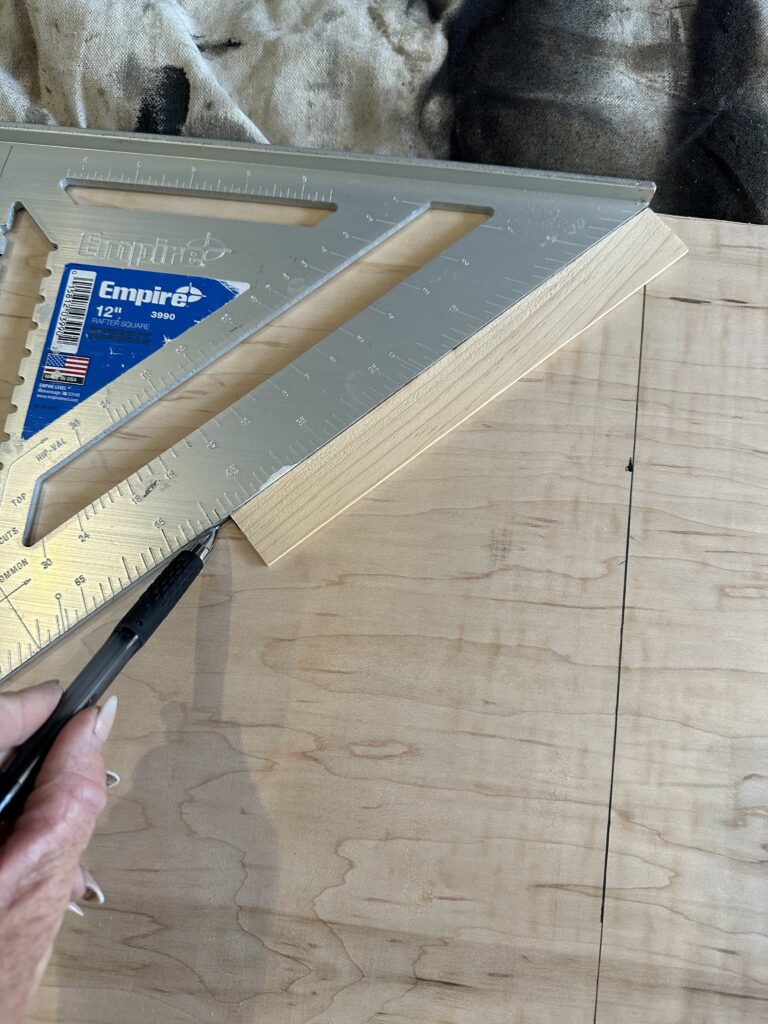
I started by finding the middle of my board and drew a line straight down it. I then used my speed square and put the flat side against the side of the board. I put the top corner right at the line and put down my first stick. I continued to work my way down that line, laying one stick at a time.
Continue the pattern
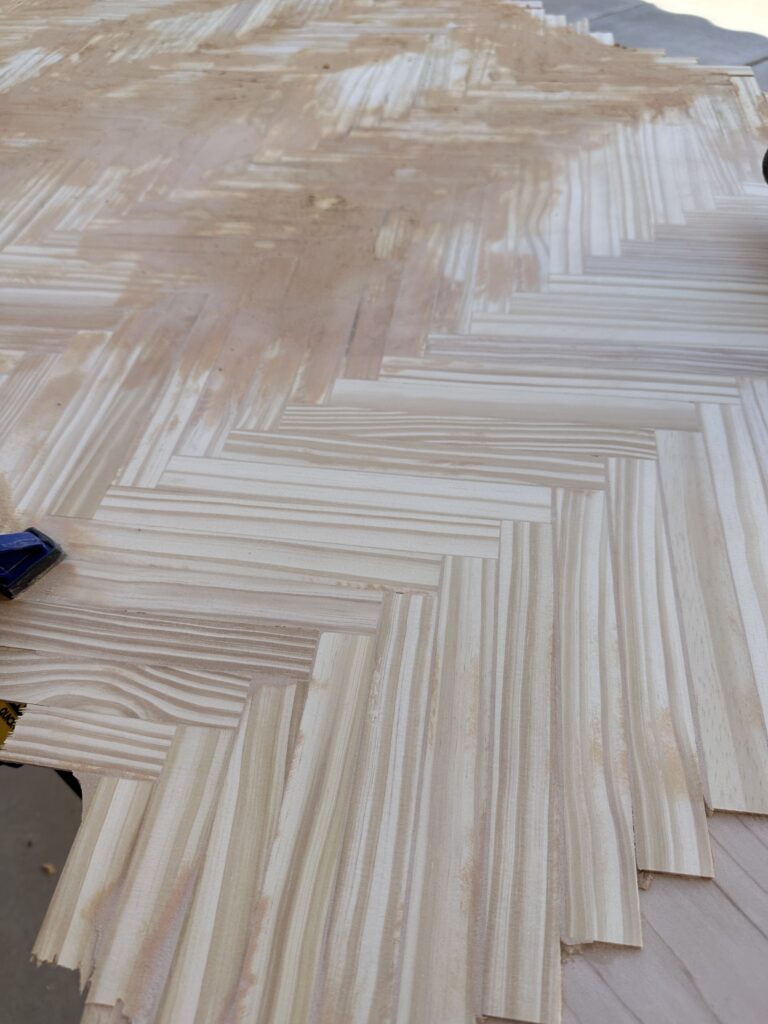
From there I continued to glue sticks using the same pattern until I had the board completely covered. I tried to keep the sticks as close together as I could. I also used weights and boards to hold down each row as I completed it to keep the sticks as flat as I could.
Wood filler and sanding
Once the glue was dry, I used wood filler to fill in any gaps between the sticks. Once that was done, I sanded it all down. I used my Dewalt orbital sander to do this. I started with a coarse sandpaper at first to get most of the wood filler off and then I went back over it with a fine sand paper.
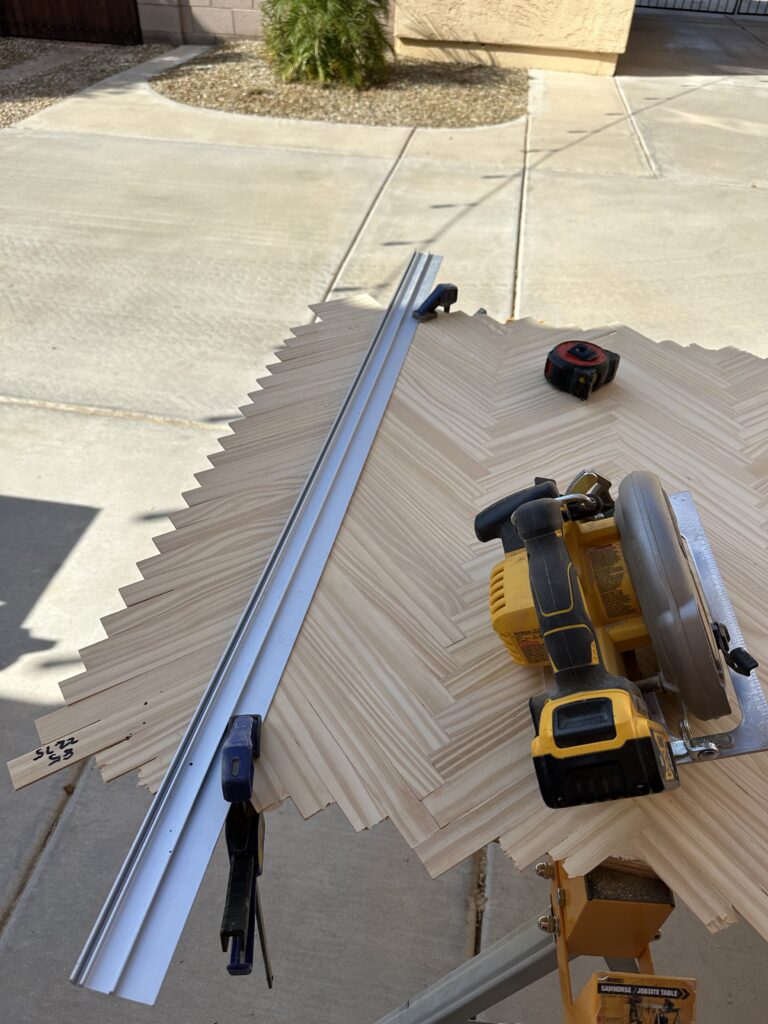
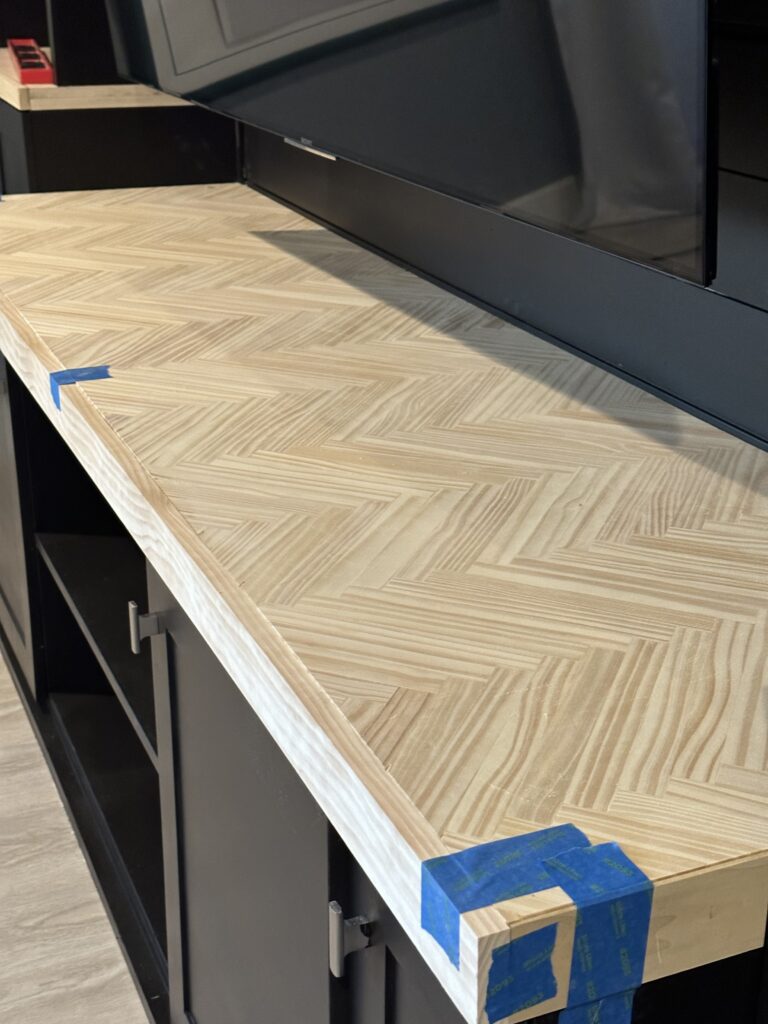
Cutting it down to size
Once it was all sanded, I marked where I needed to make the first cut. I lined up my straight edge and held that down with clamps. I then used my Dewalt circular saw to cut it down. I did this on all four sides to get the size I needed.
Attaching to cabinet top
Once it was all cut down to size, it was easy to attach to the top of the cabinet. I used some wood glue to glue it to the top. I then took my nail gun and added a few nails to really secure it. I finished it off by adding a board to the front and side to make it appear much thicker than it is.
Finishing touches
To finish the cabinet top, I stained it with a custom stain that I mixed to match some of the other stained wood in our home. It is important to follow the stain up with a polyurethane clean top coat. I used one that had a satin finish so that it wouldn’t be shiny. I let it dry for about 3 days before I put anything decorations on it.
Pro Tip:
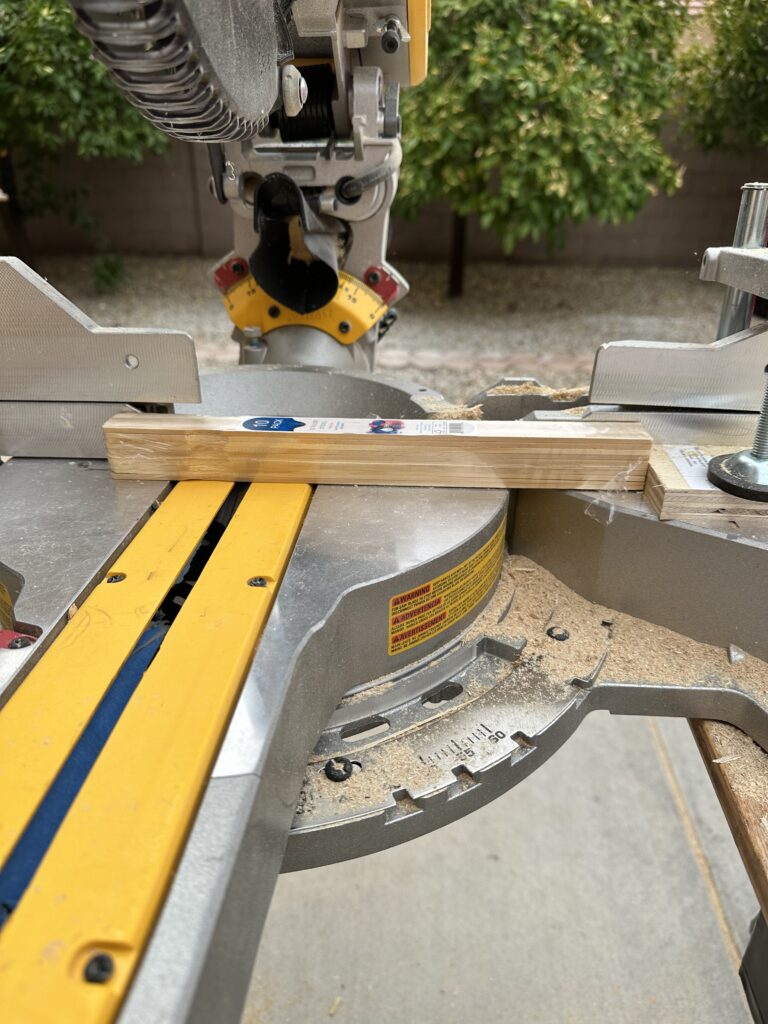
I cut over 300 paint sticks for this project. If I would have cut them one by one, it would have taken me forever. Instead, I kept them in their package when cutting them. This way I was able to cut 10 sticks at a time. If you do this, be sure to make sure all of your sticks are lined up evenly in the package before cutting. I also used a stop block on my saw so that I cut all of them at the exact same length.