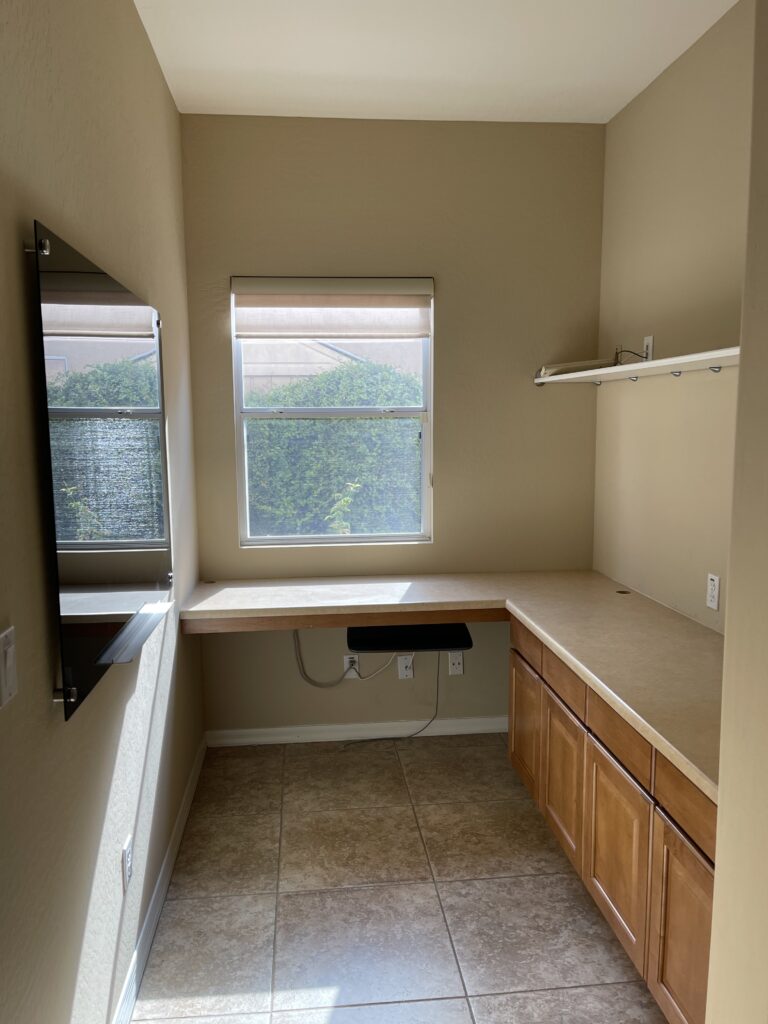
This space was a small room next to our kitchen that was not being utilized. I wanted to make it functional and pretty!
What to do with this space...
This small room is located next to our kitchen. On the blueprints, it was labeled as a technology room. I am not sure exactly what that means, but I was confident that we could create a space that was much more useful. Since this room can be seen from our kitchen as well as our family room, I wanted it to be really pretty.
Let's visualize a new pantry...
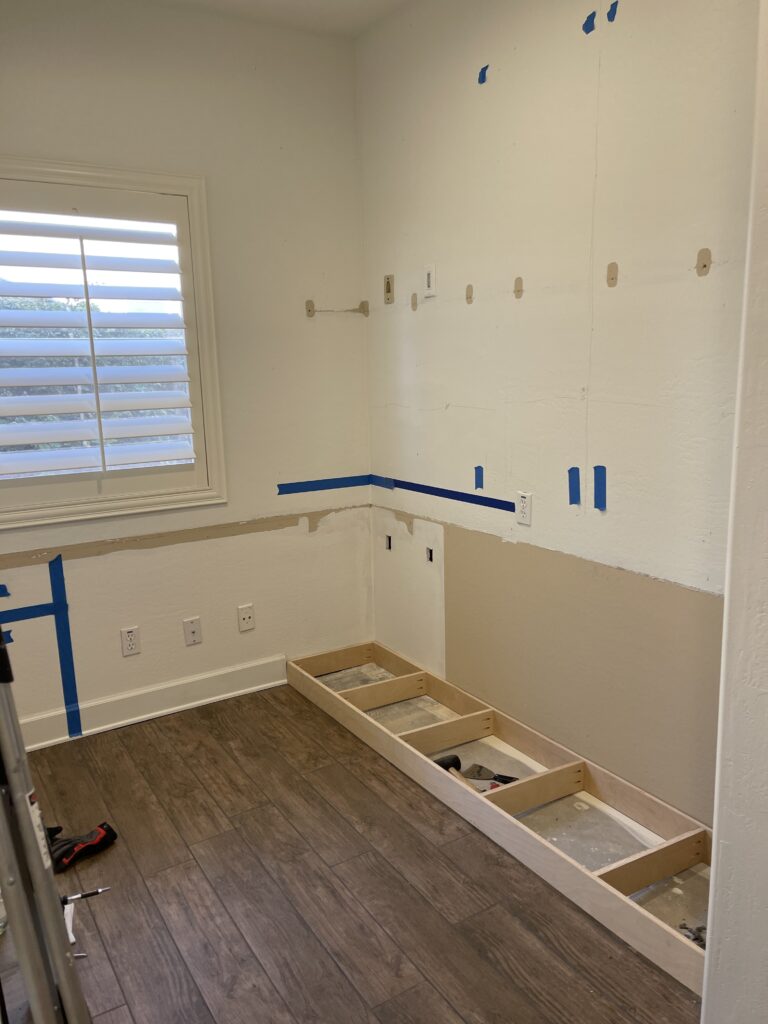
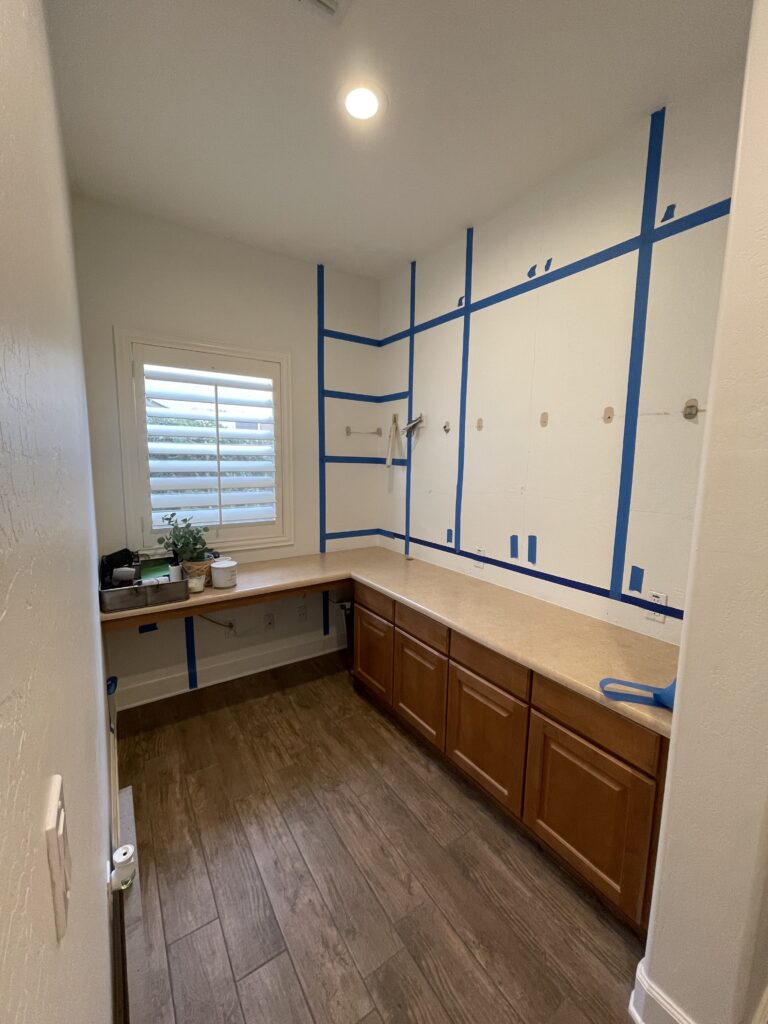
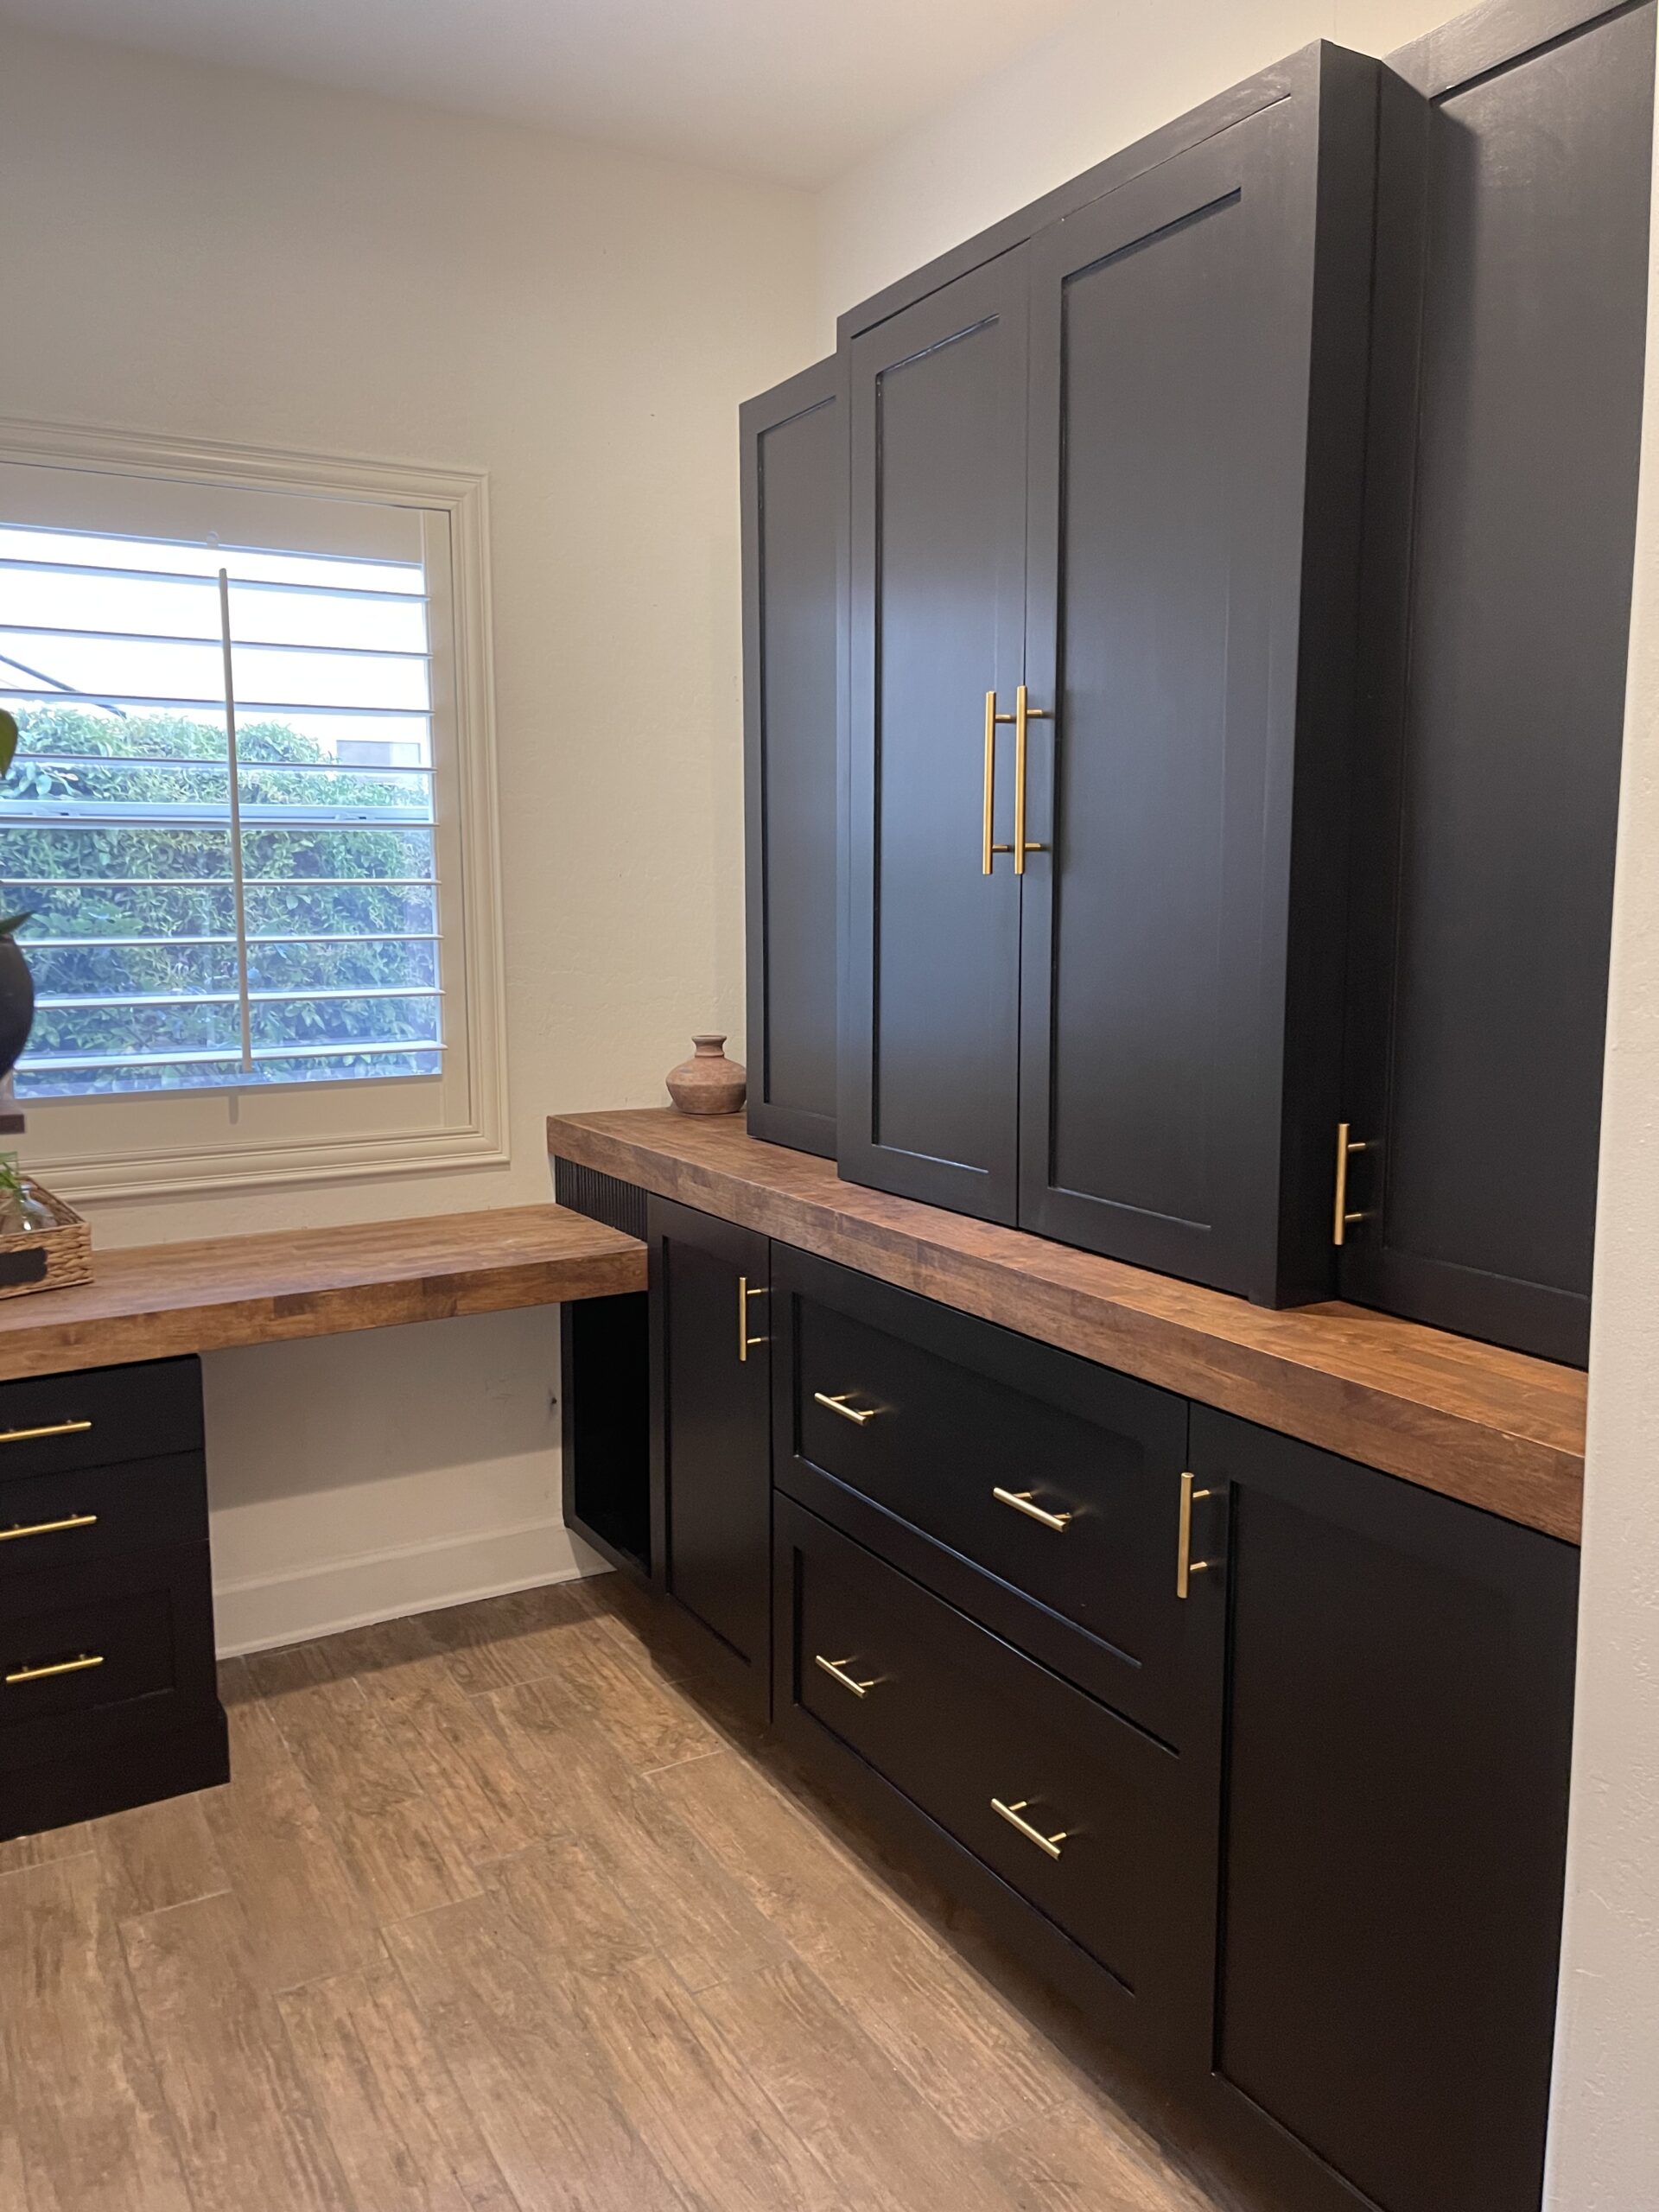
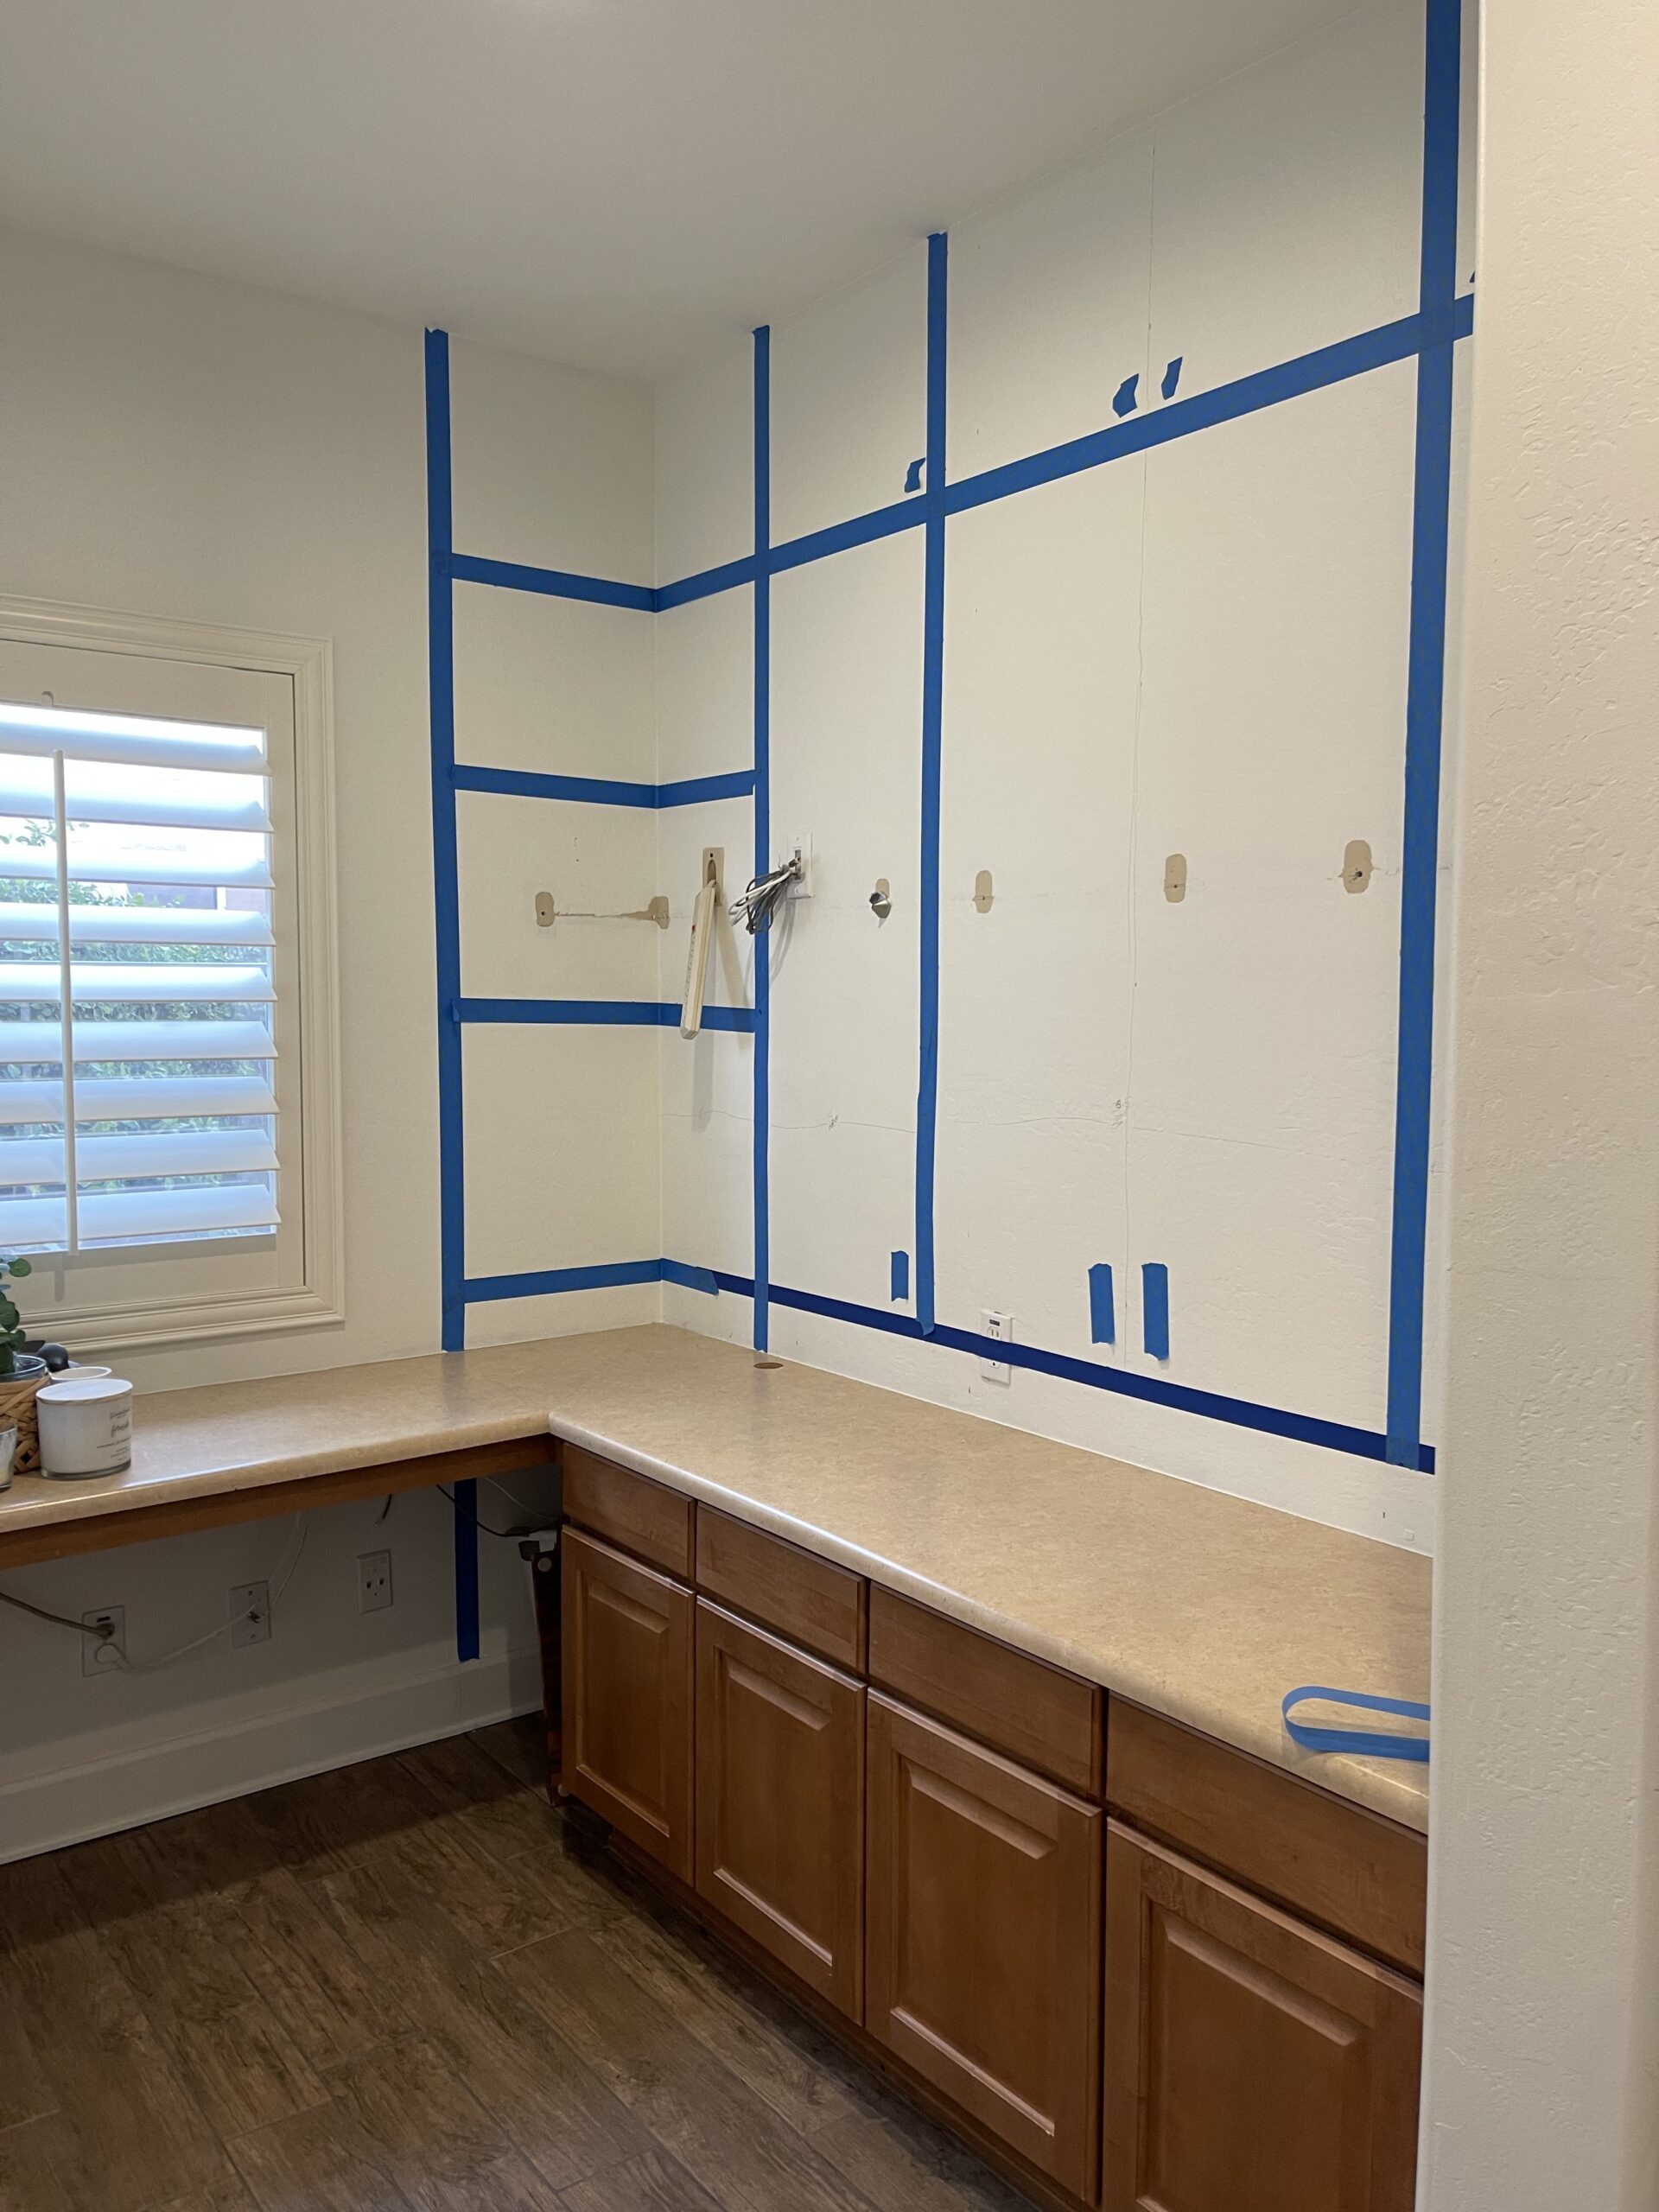
Sometimes I dream up ideas in my head, but when it comes to proportions, I find it really helpful to tape off the walls so I can better visualize what the space would look like. I knew that I was going to replace the bottom cabinets with cabinets that were a little more functional. I was going to make the new cabinets to match the same height, so I was able to start making decisions about the top section. I knew that I wanted a large appliance garage in the middle cabinet. By taping everything off, I could see that I could also add a smaller set of cabinets on top.
Let's start at the bottom...
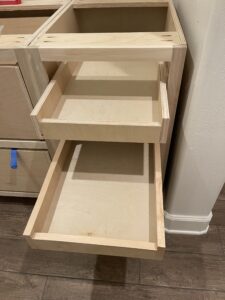
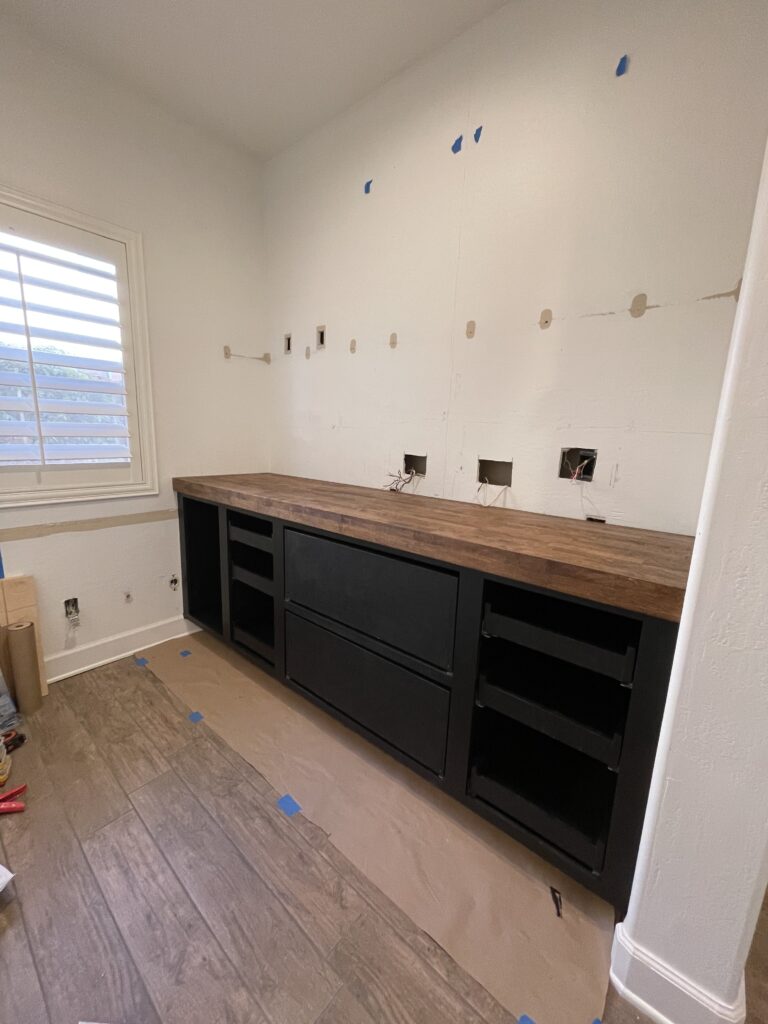
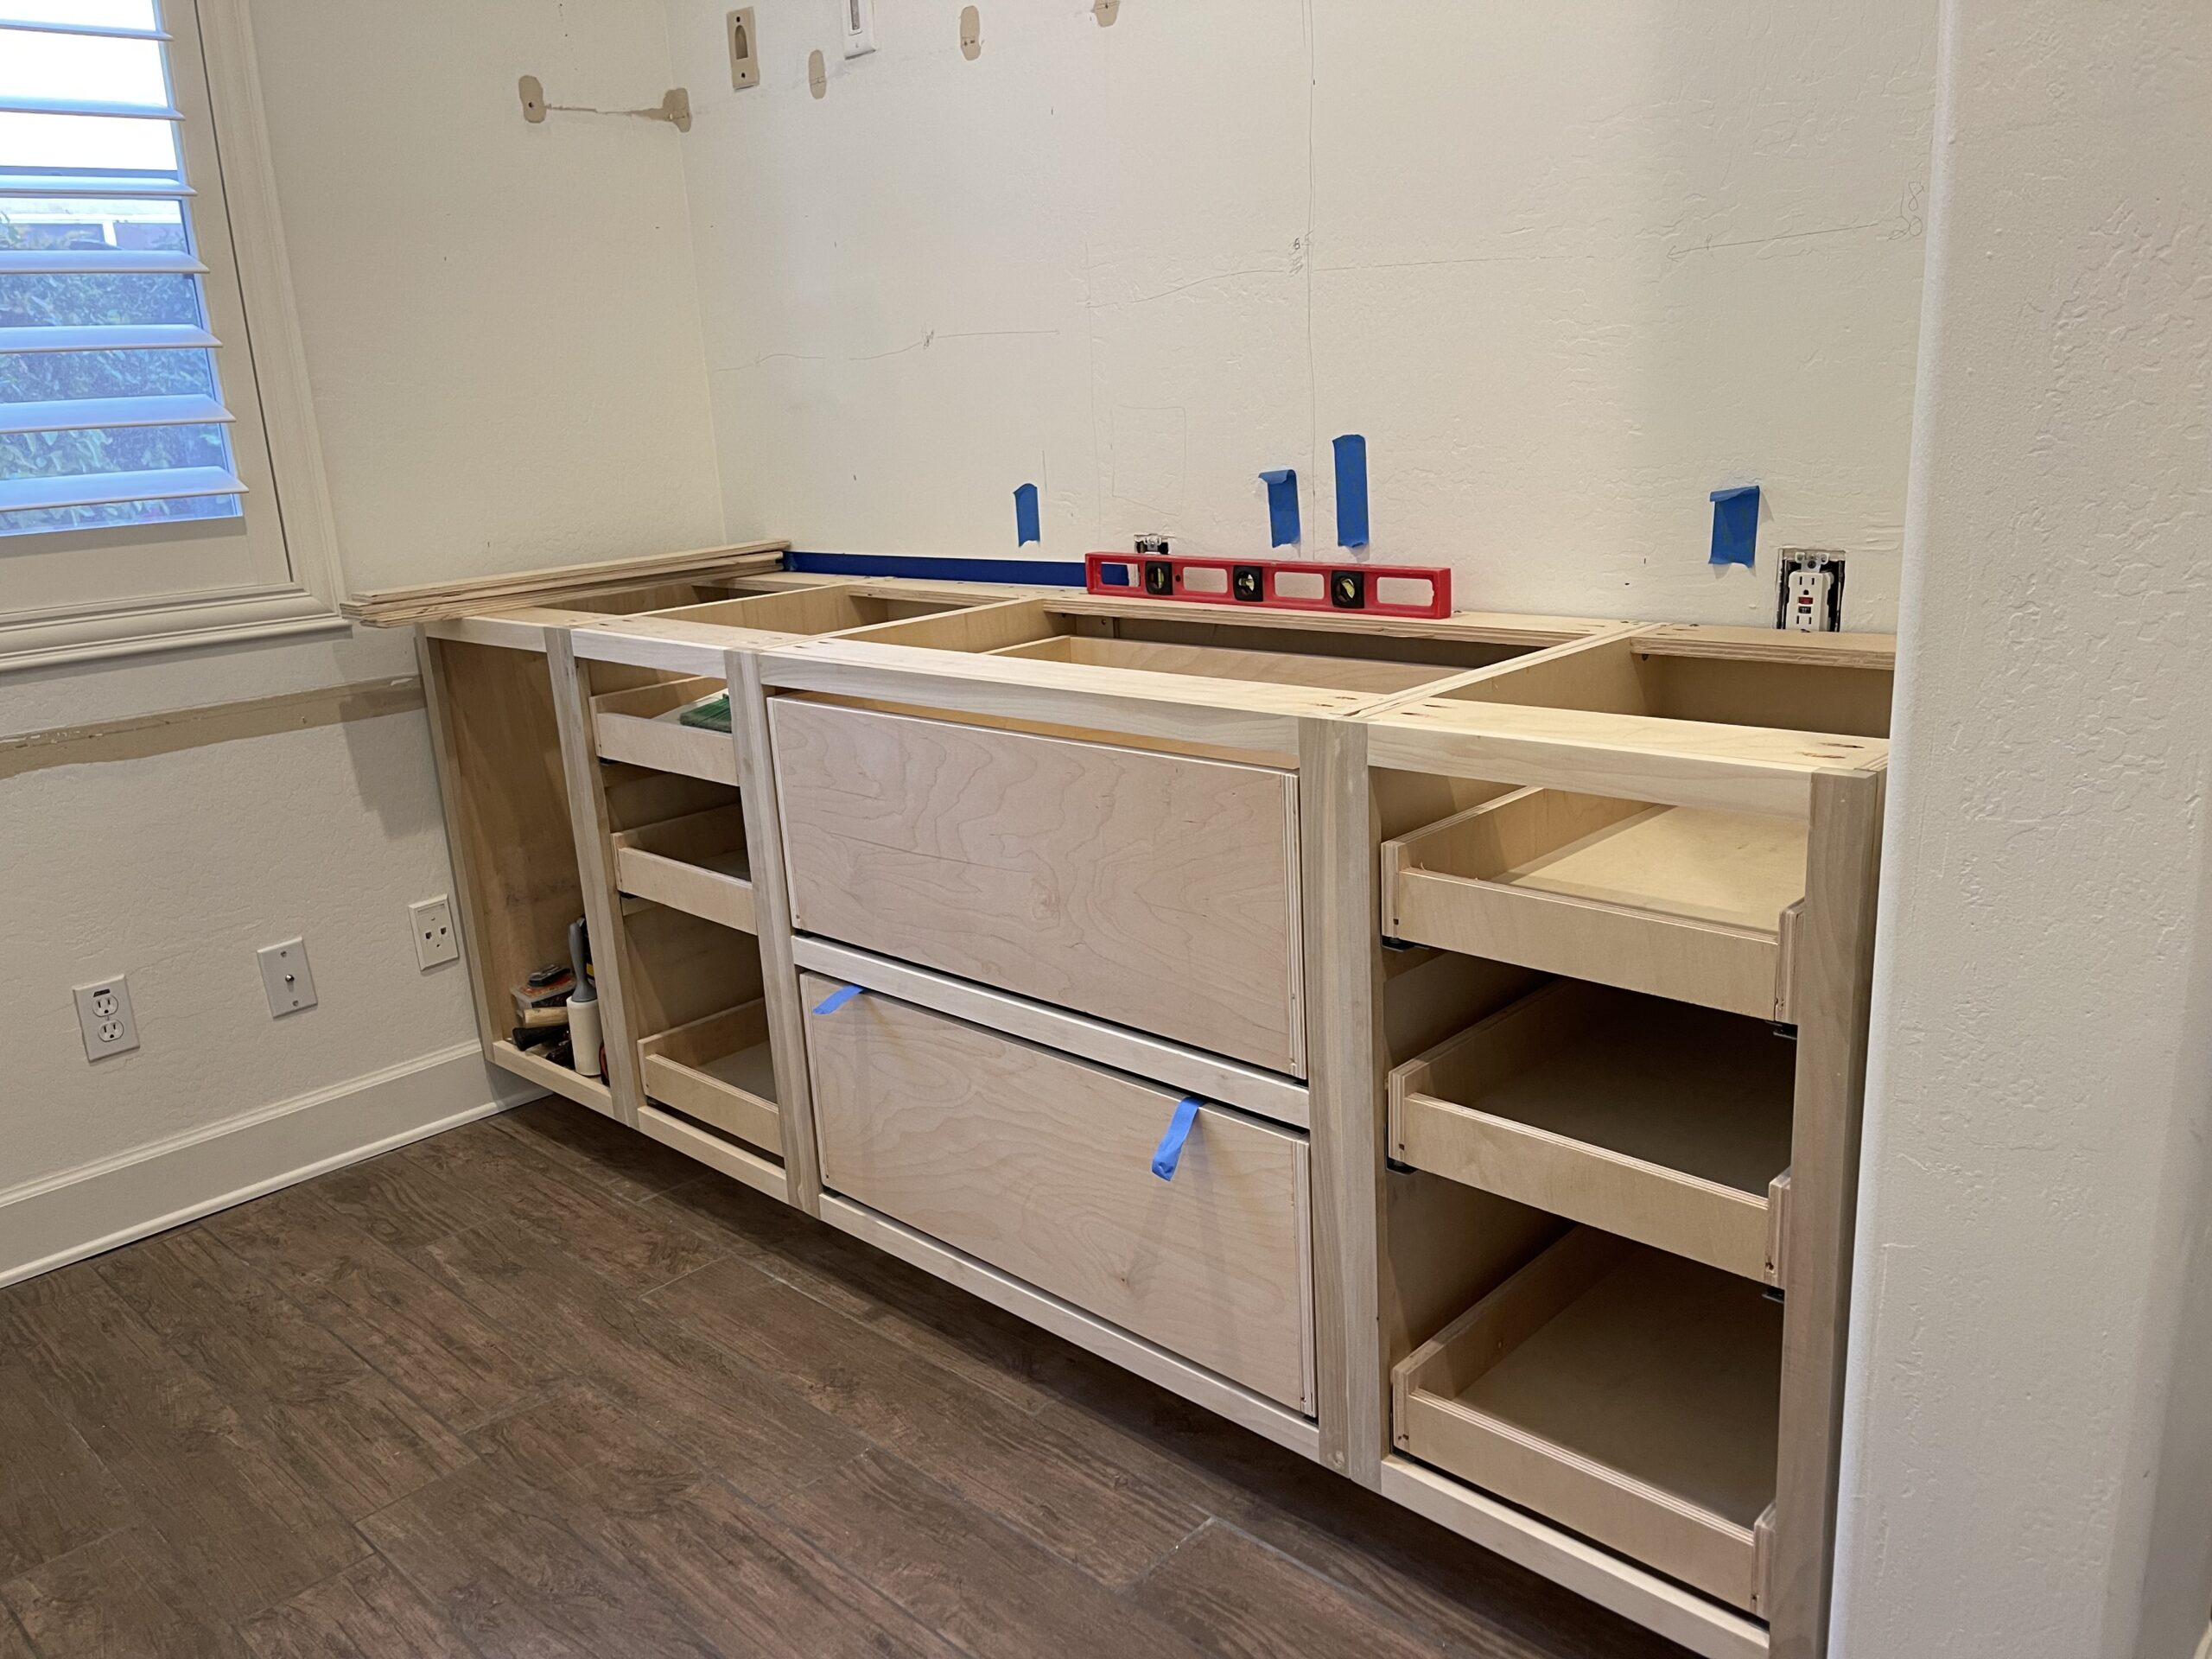
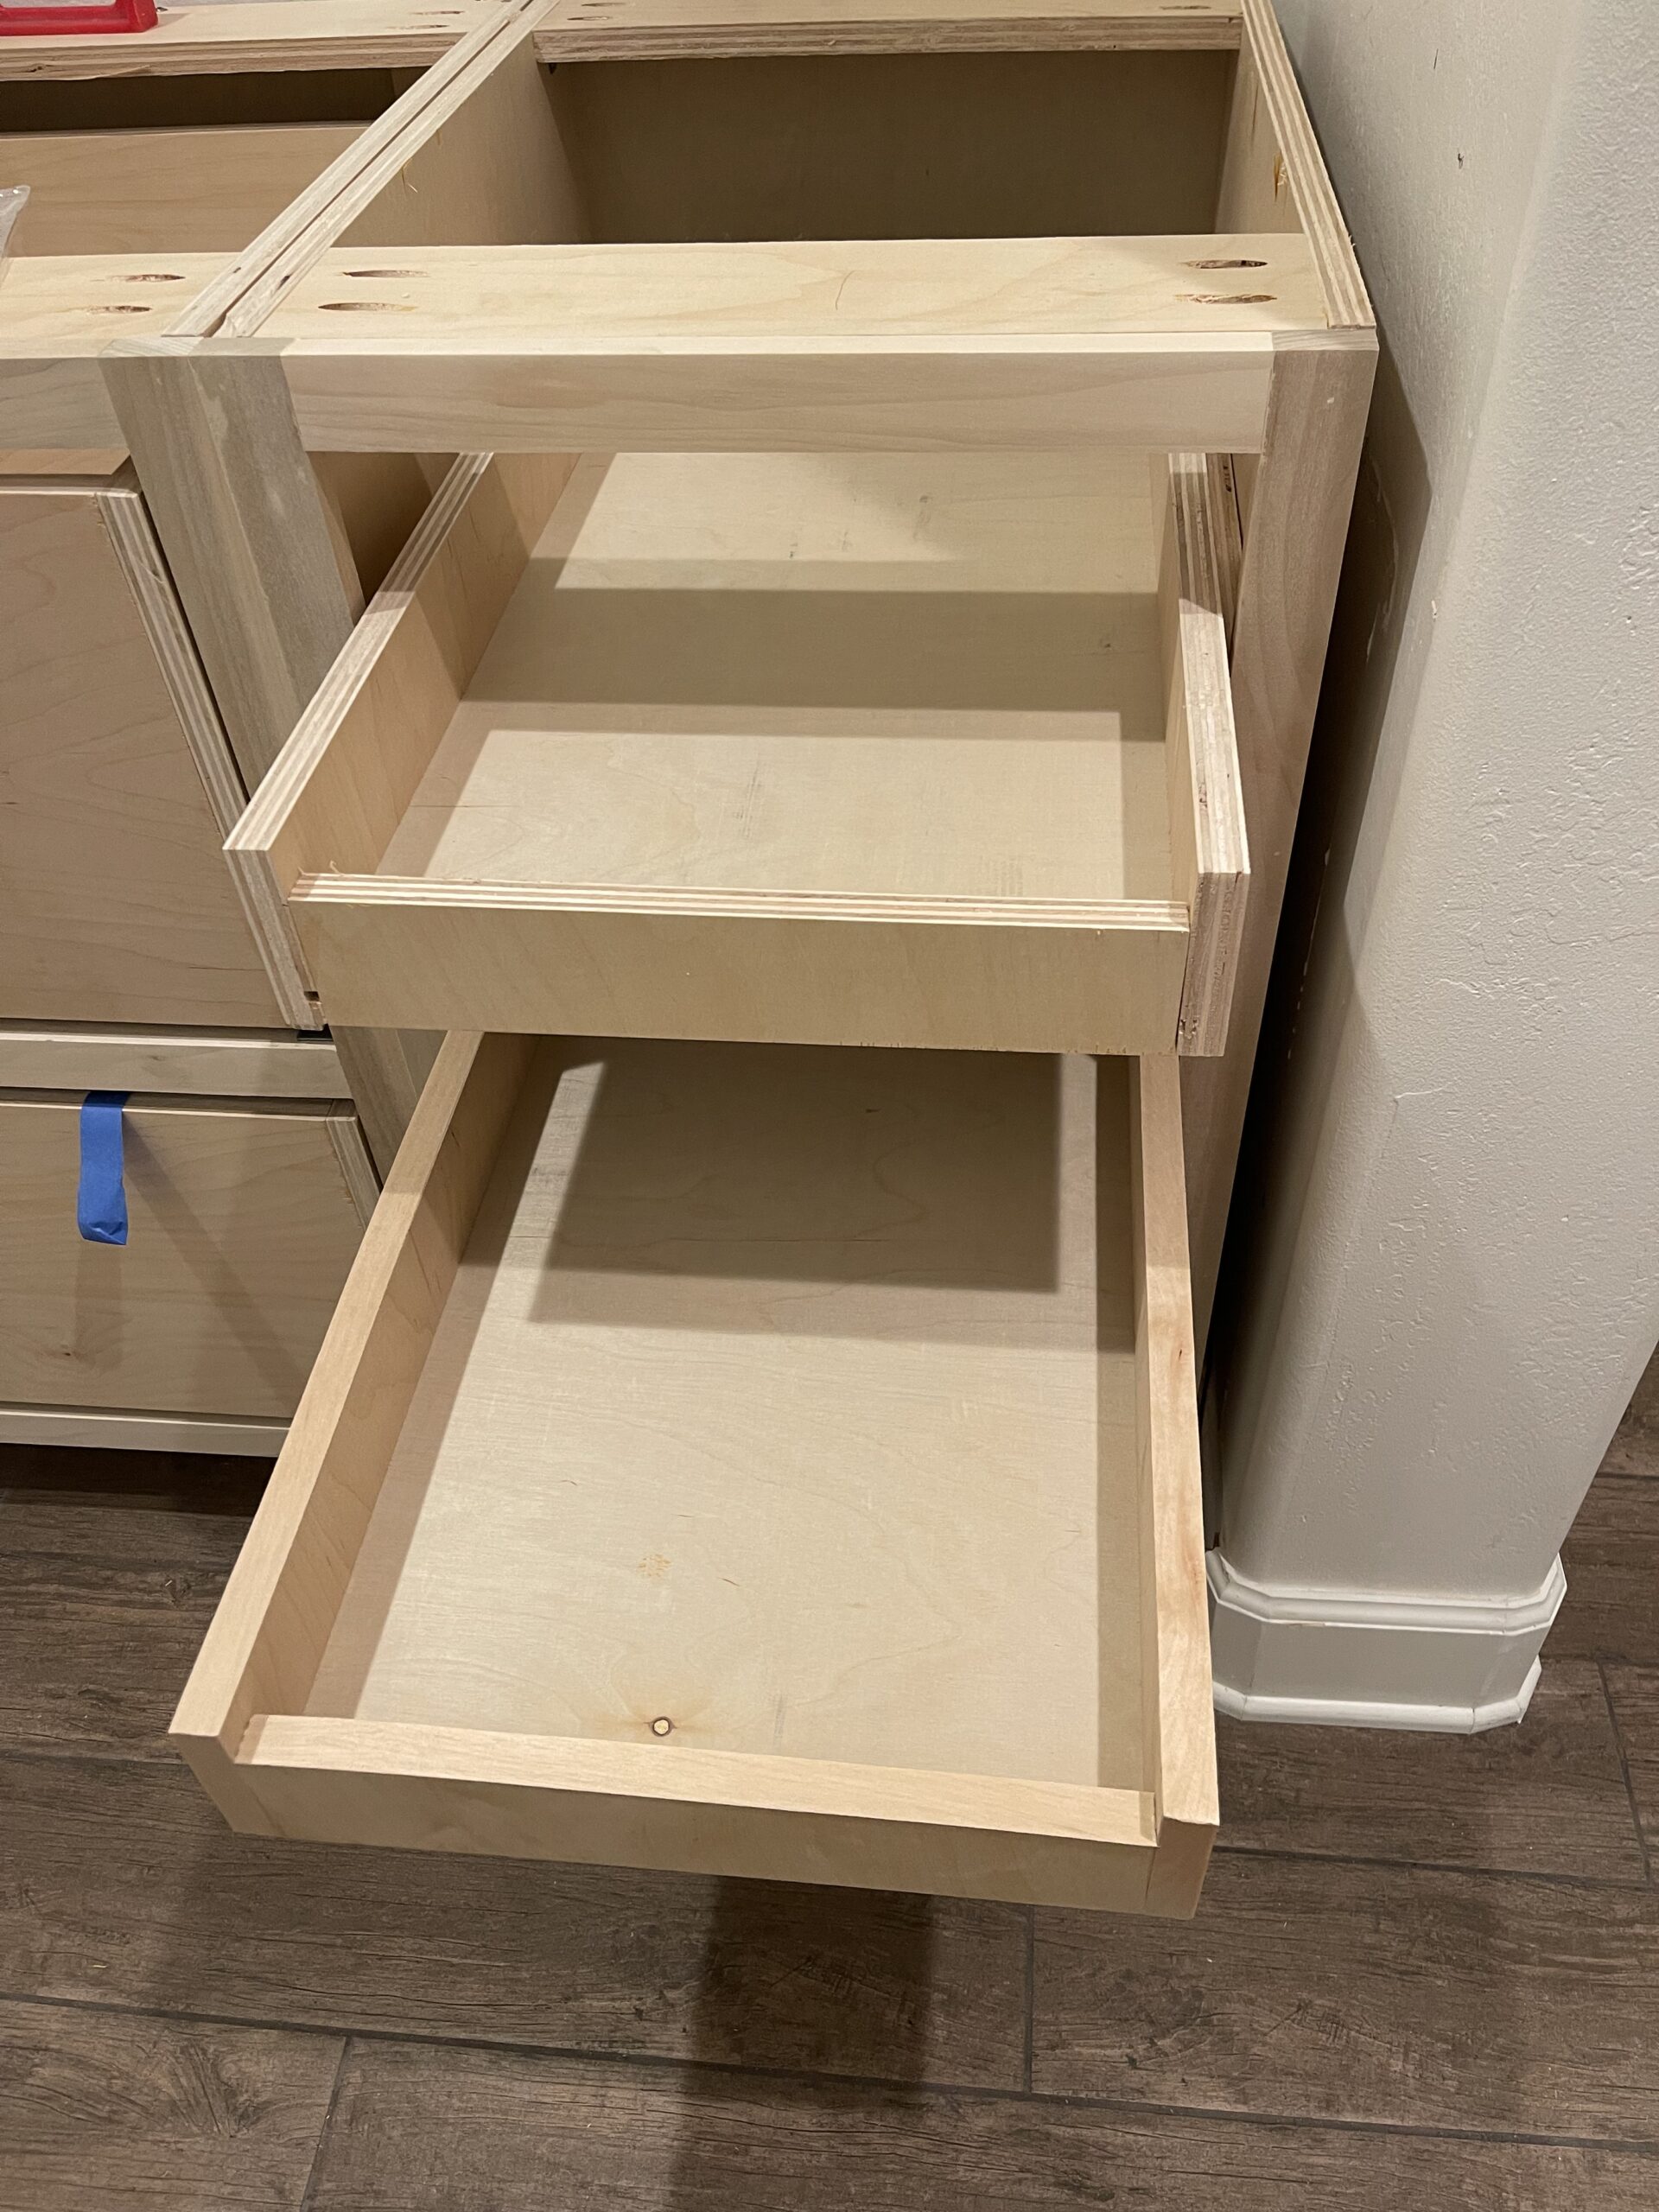
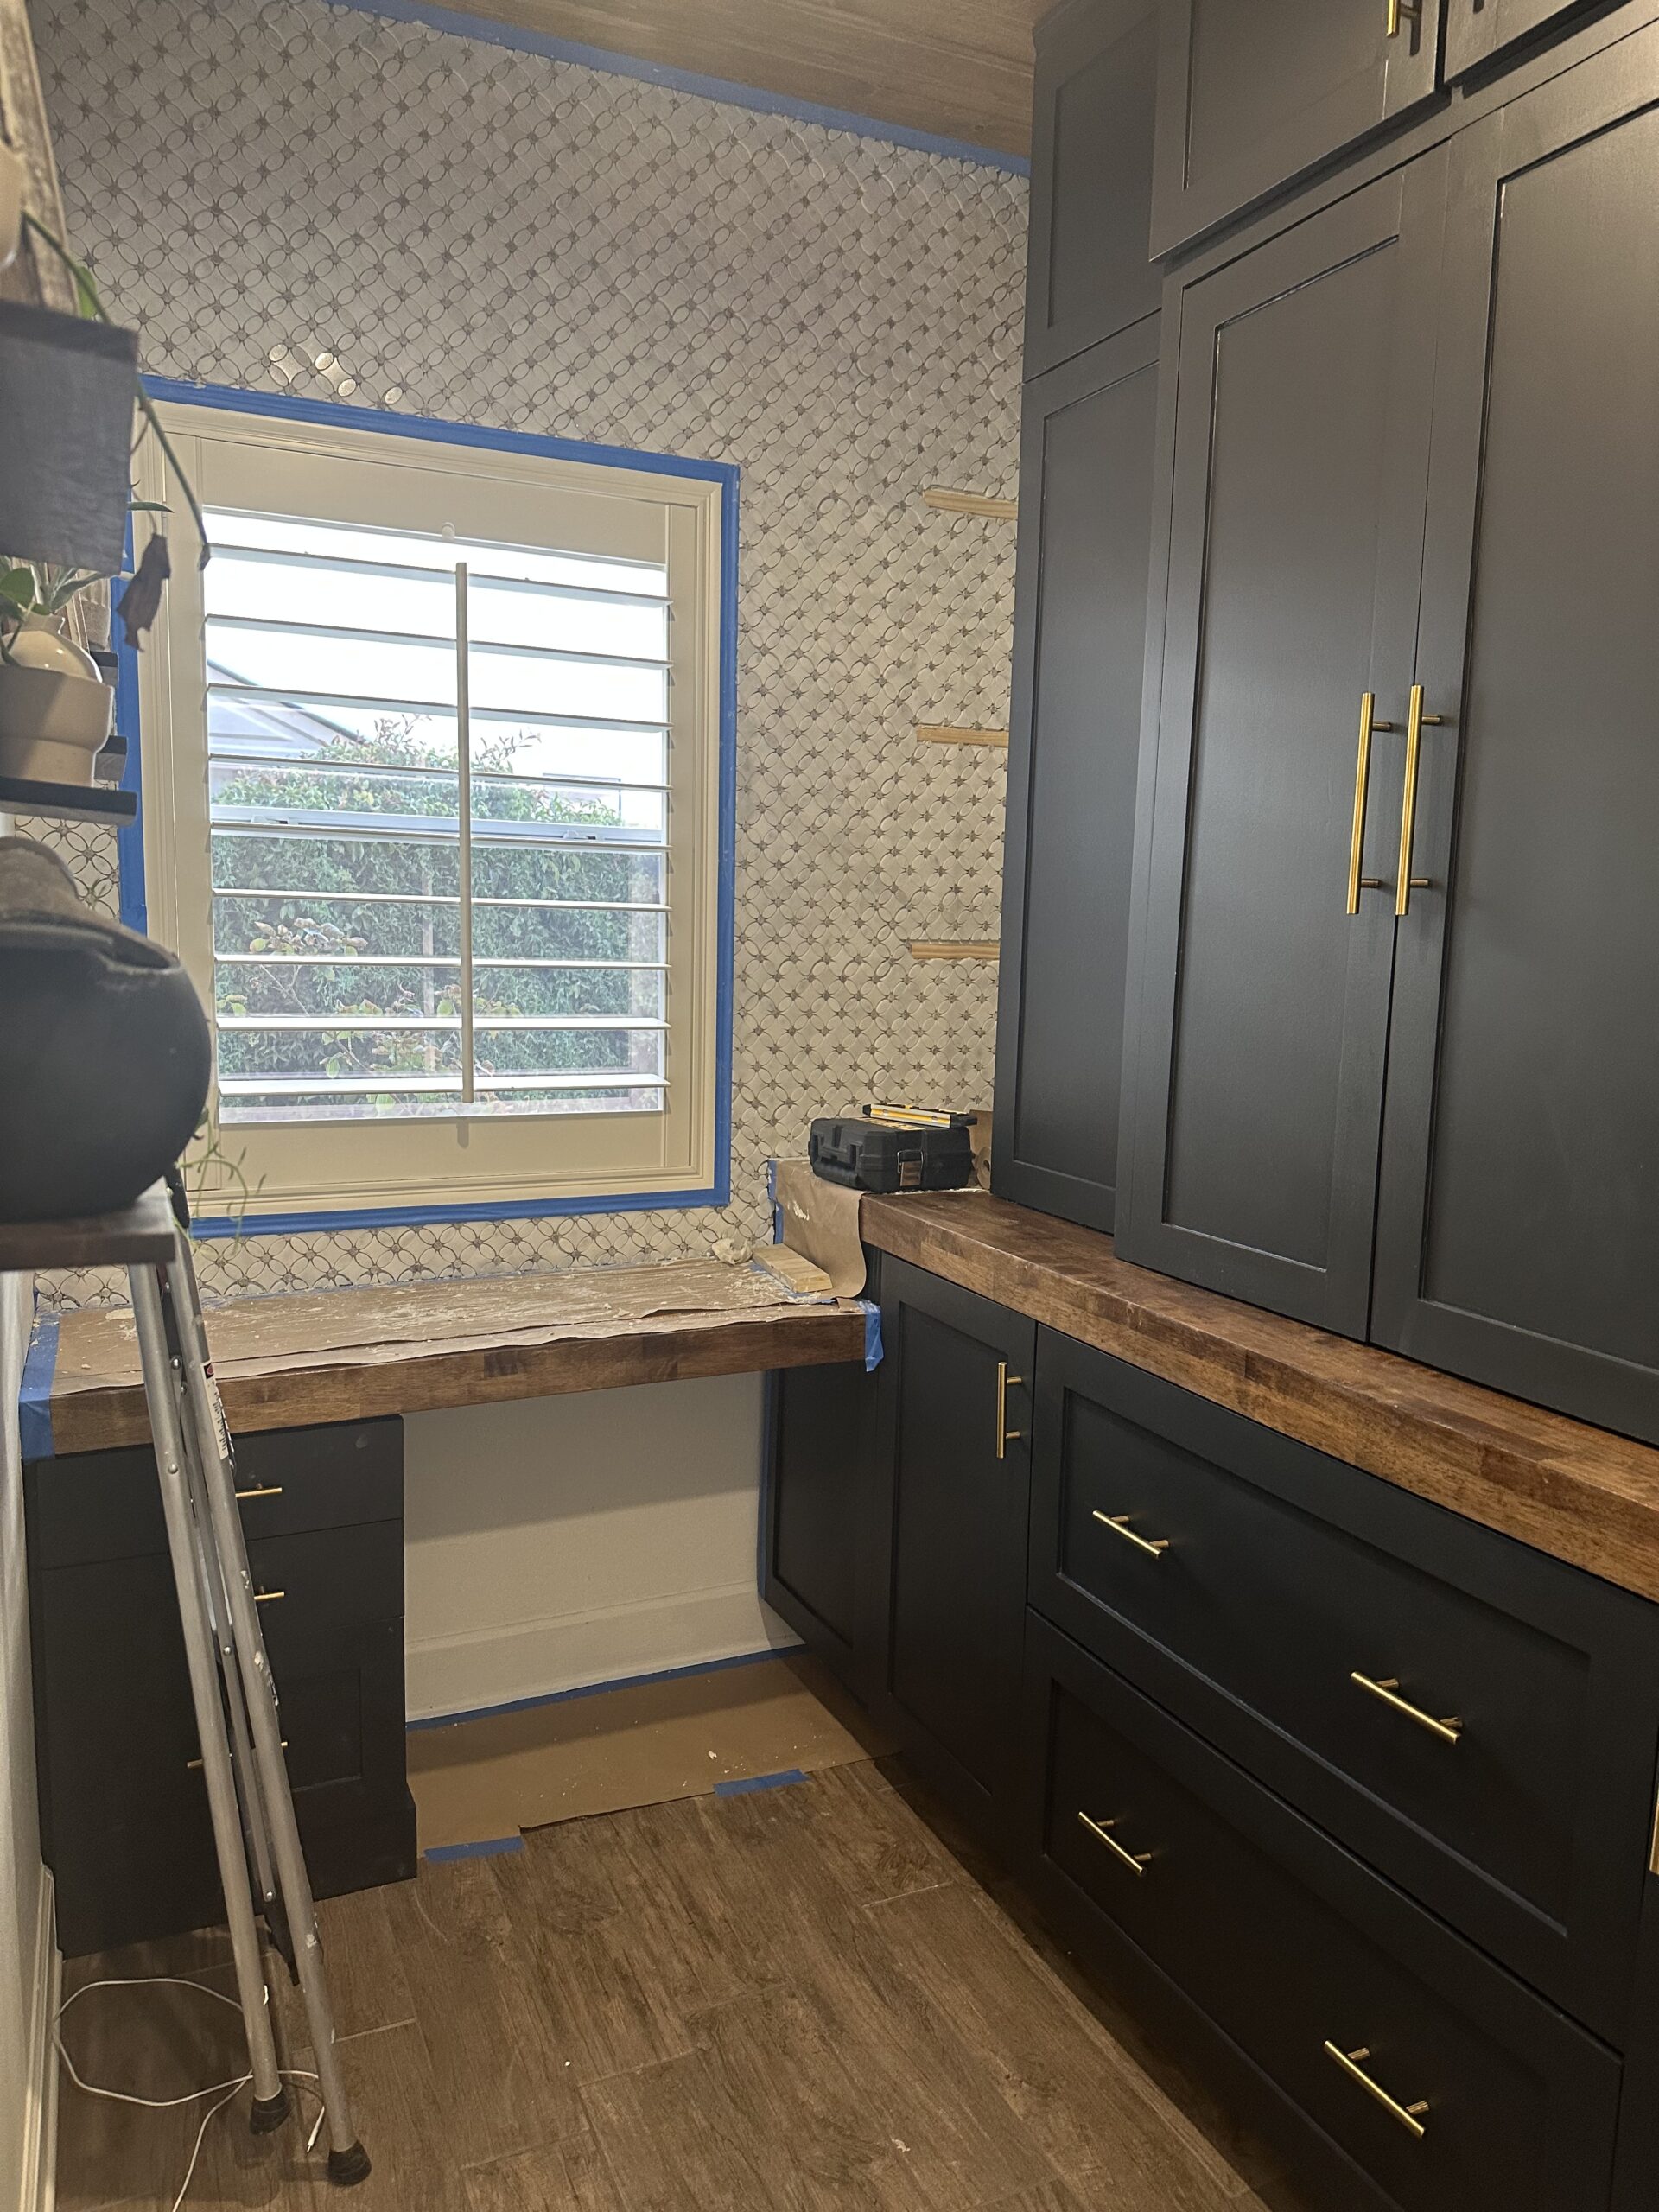
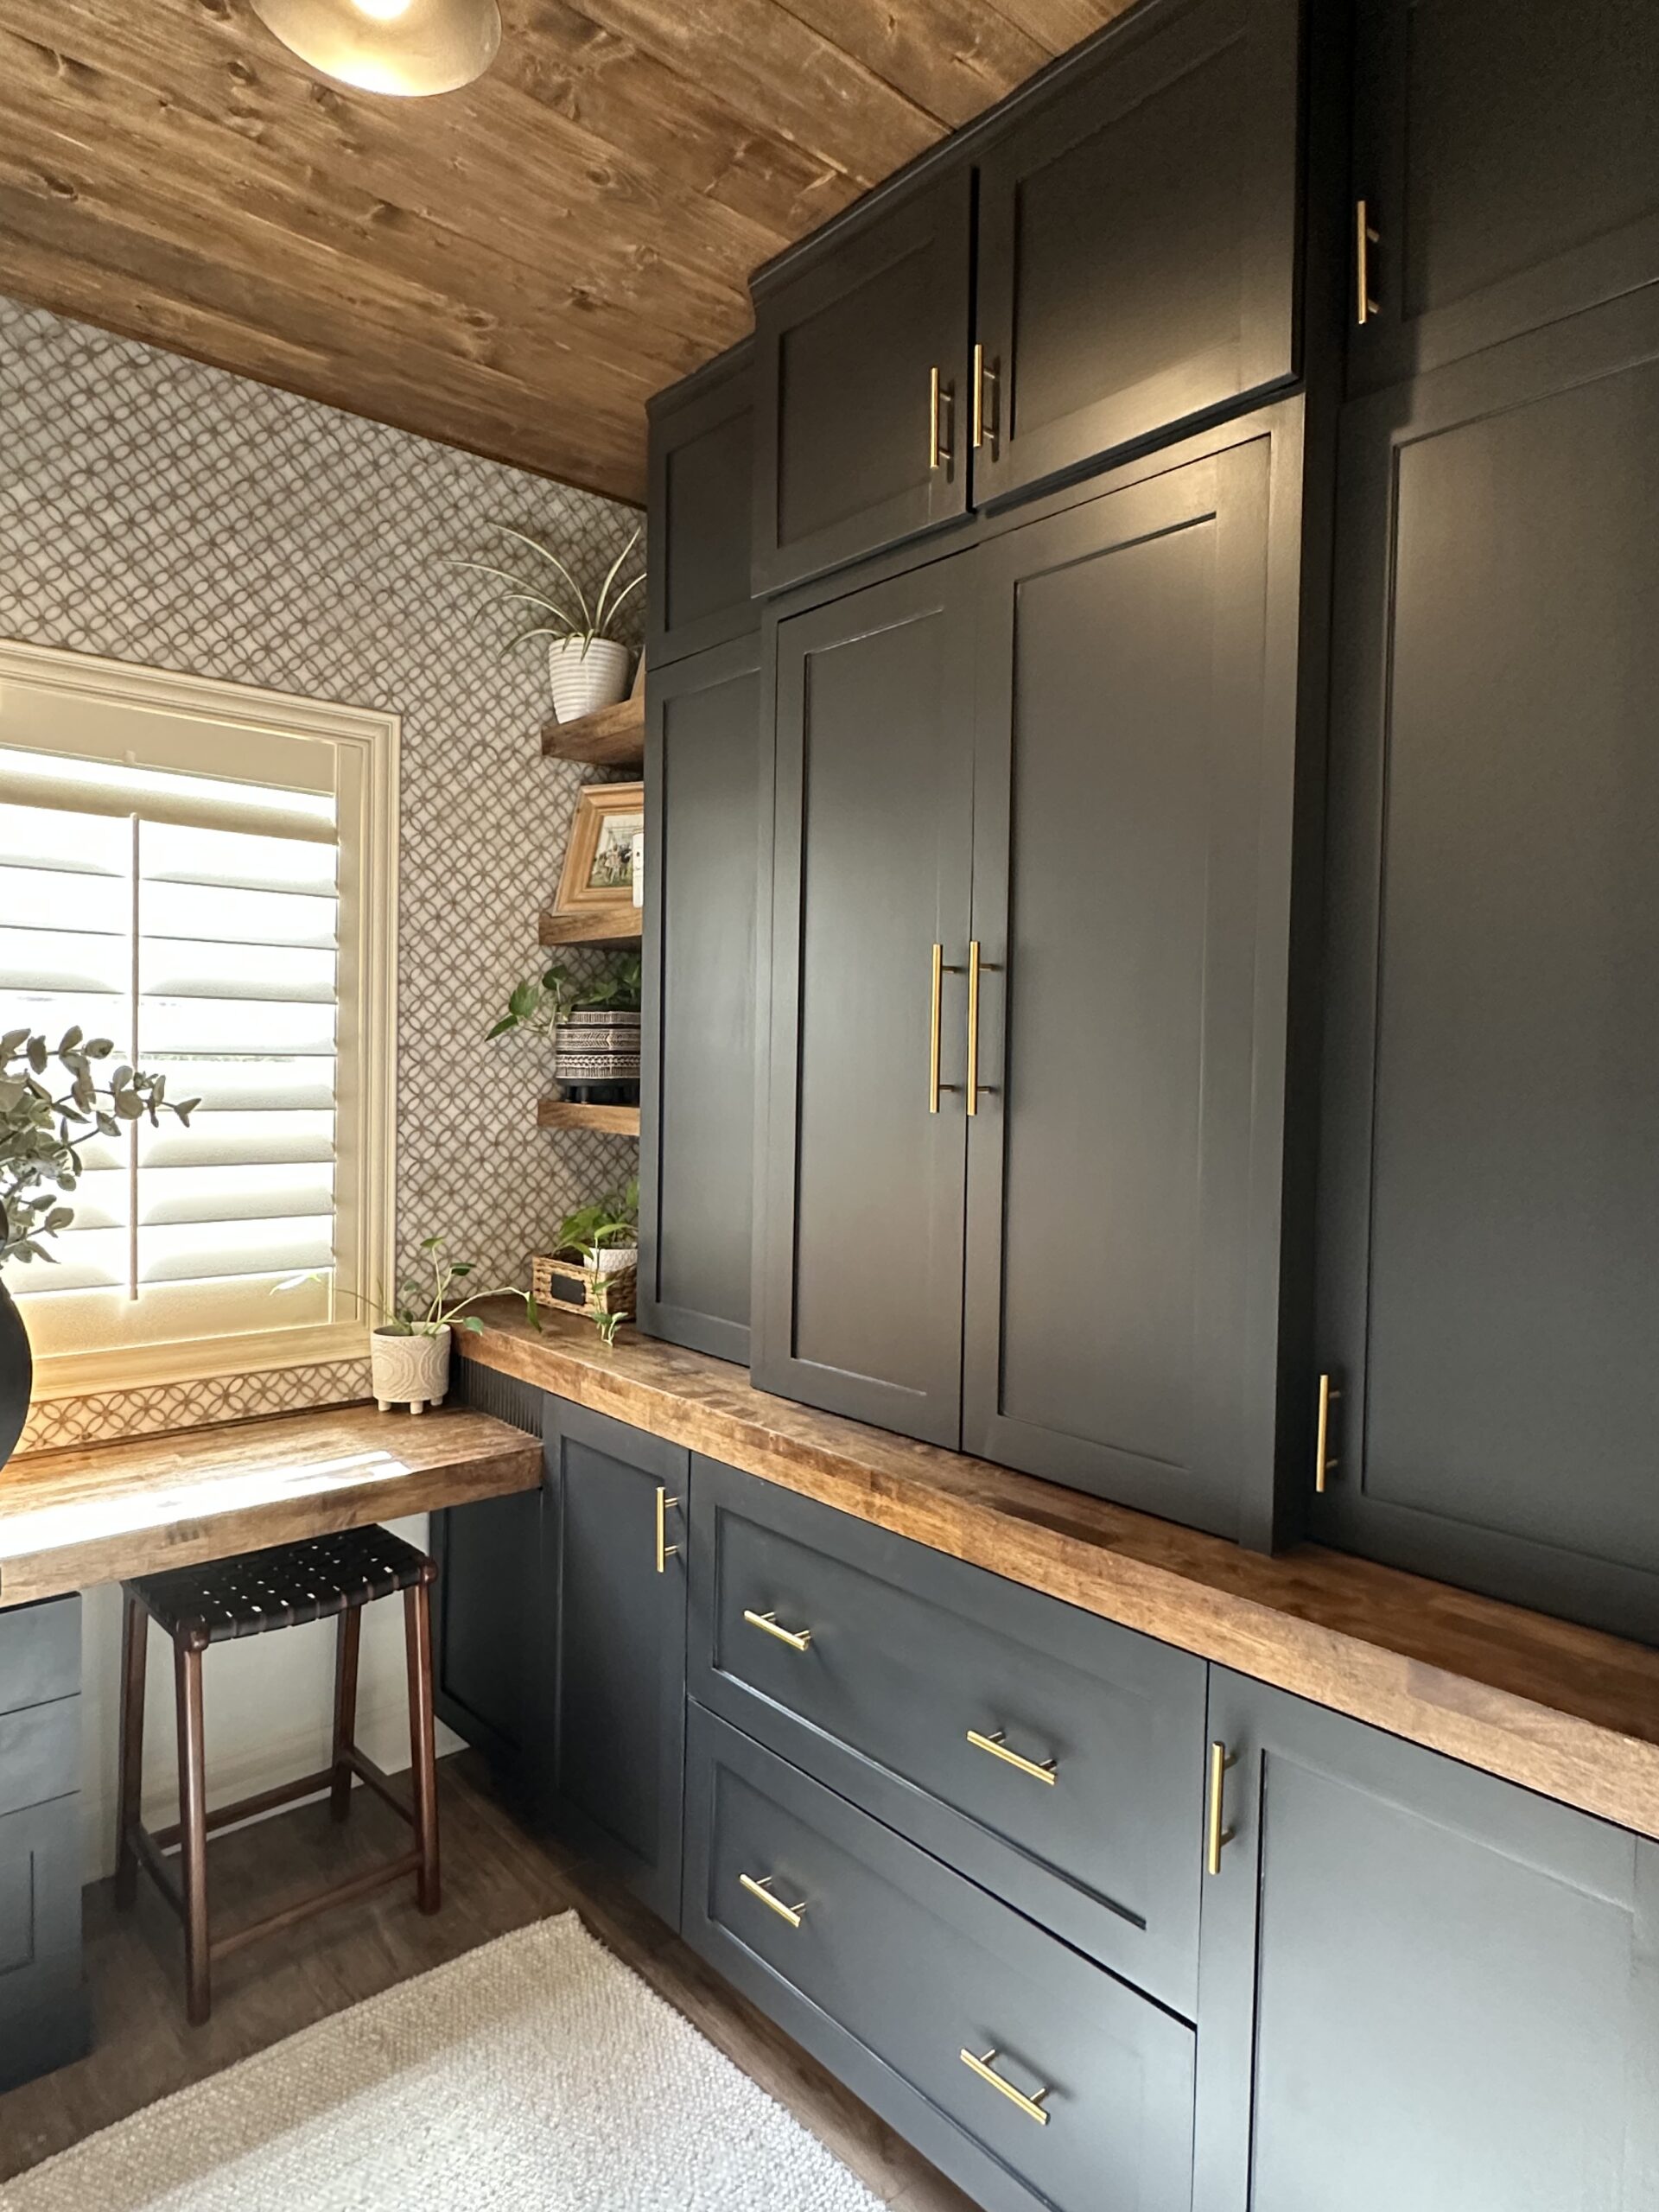
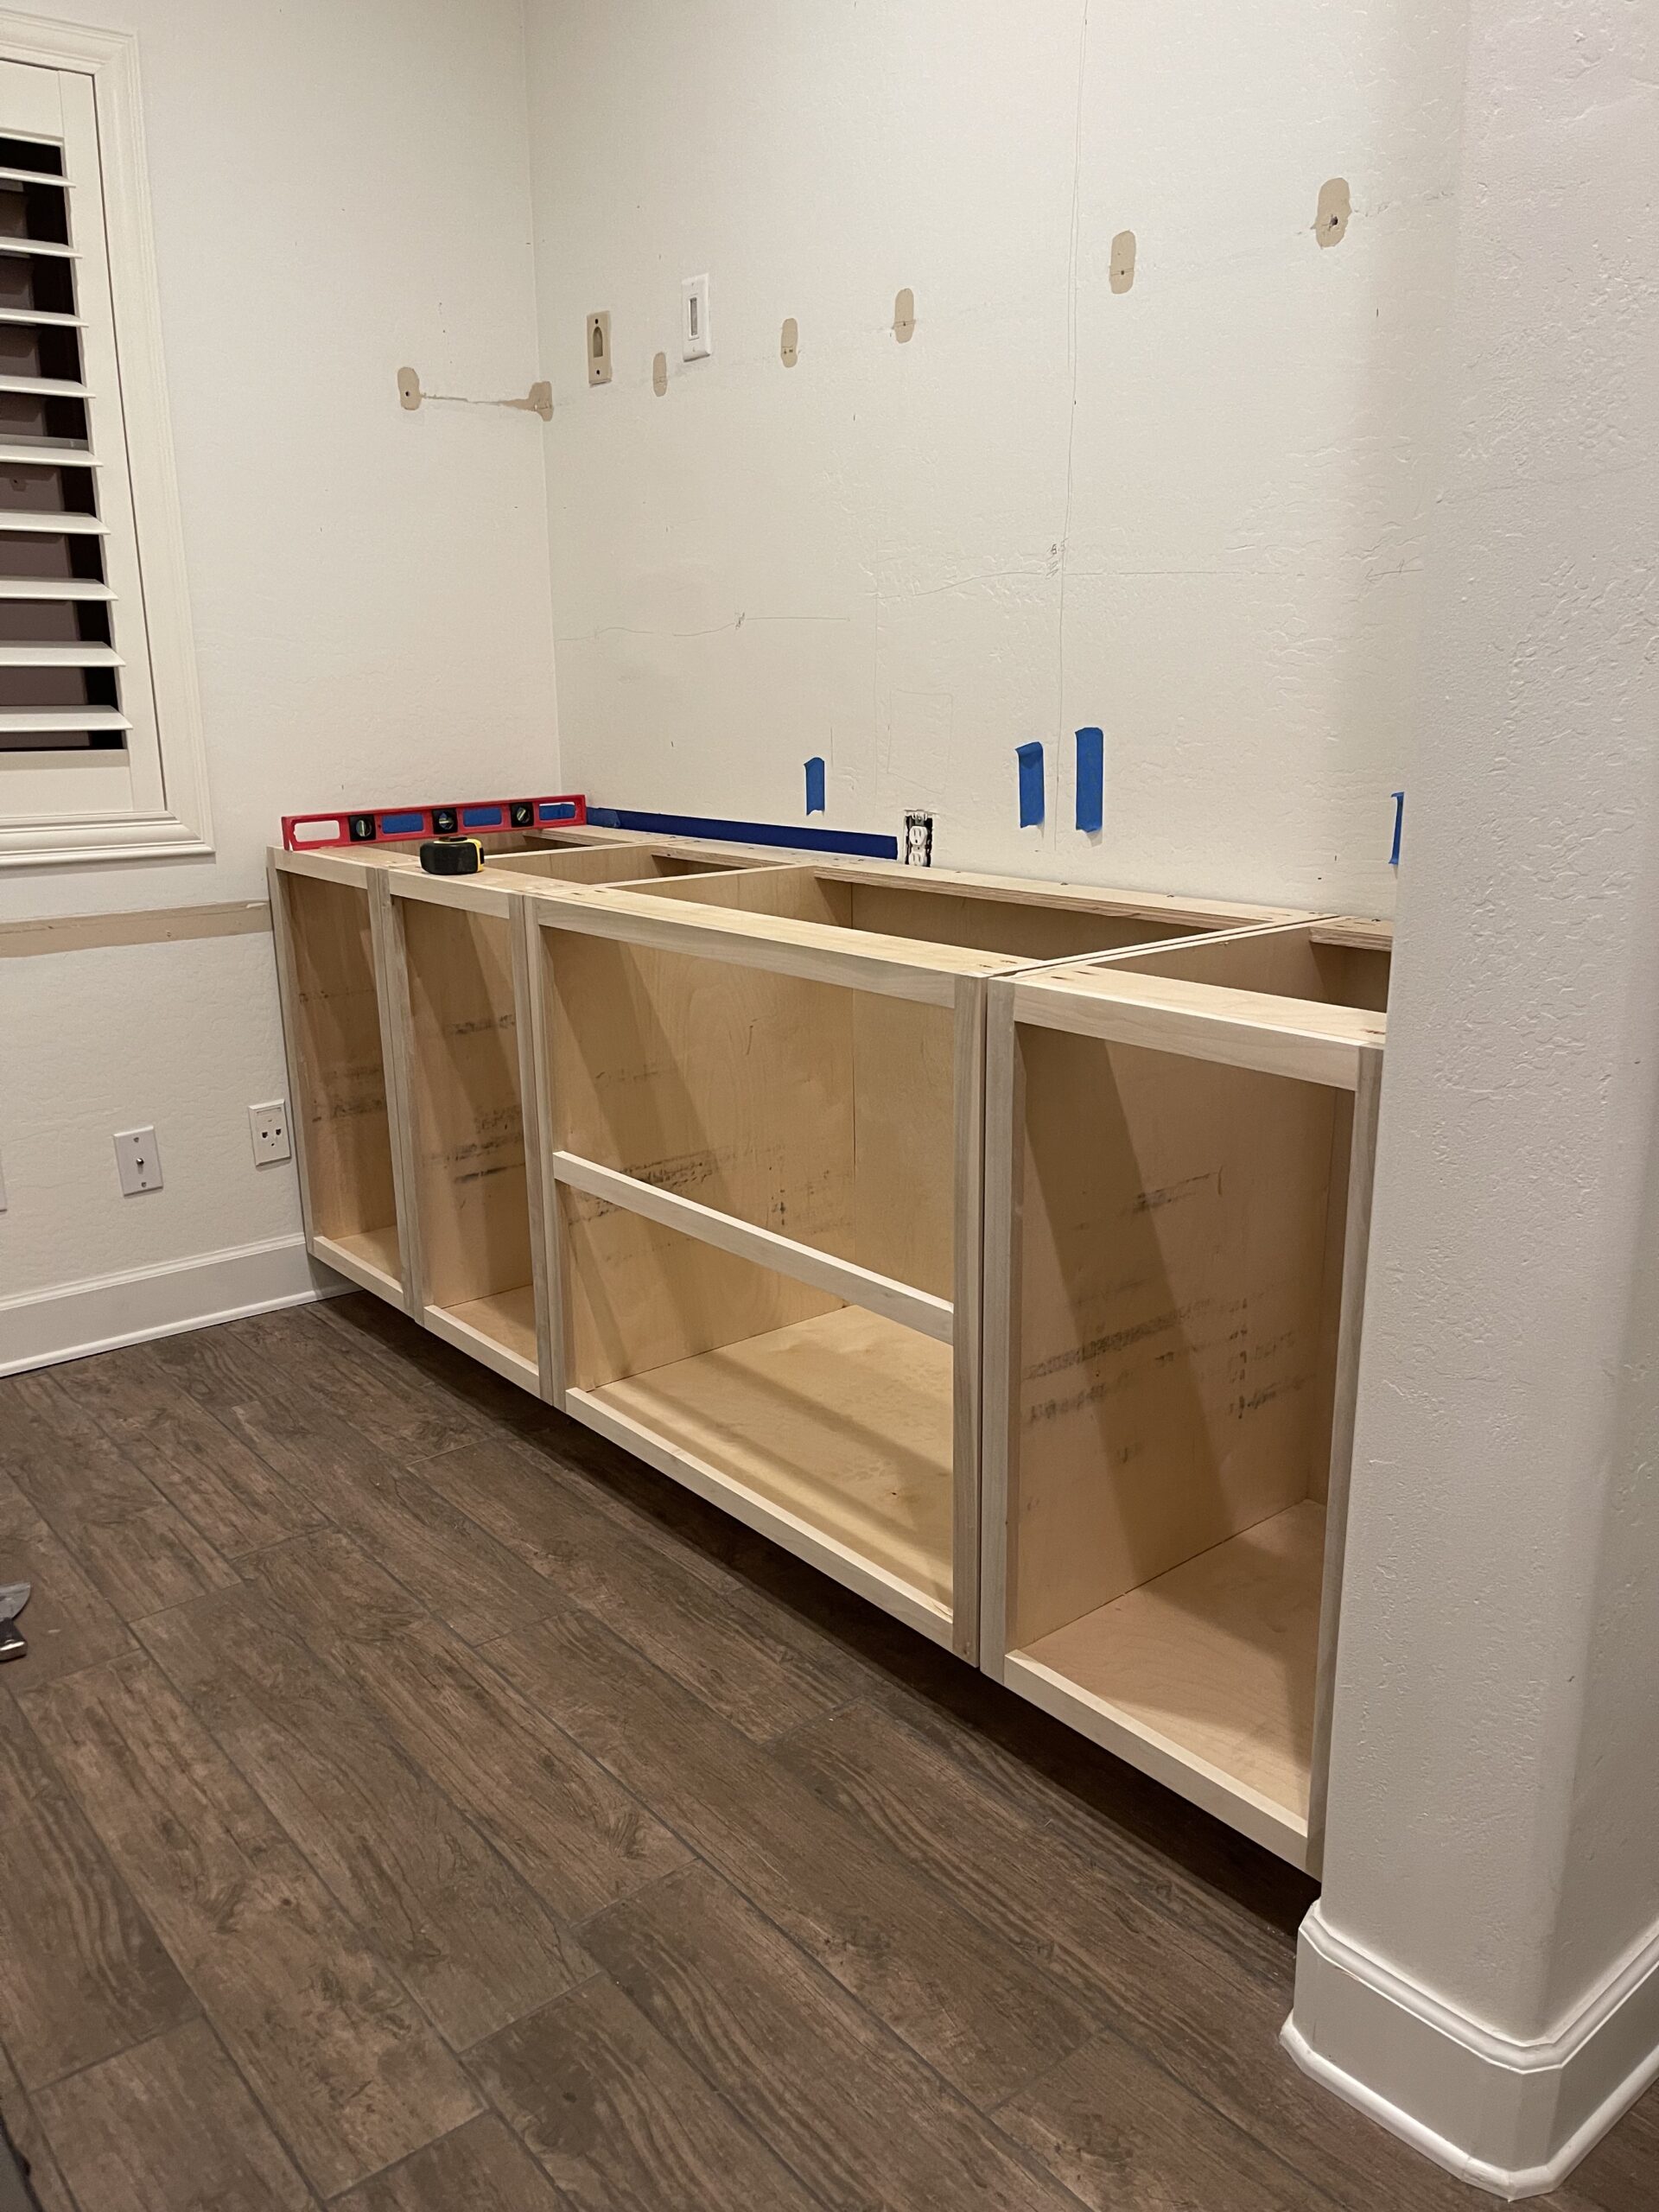
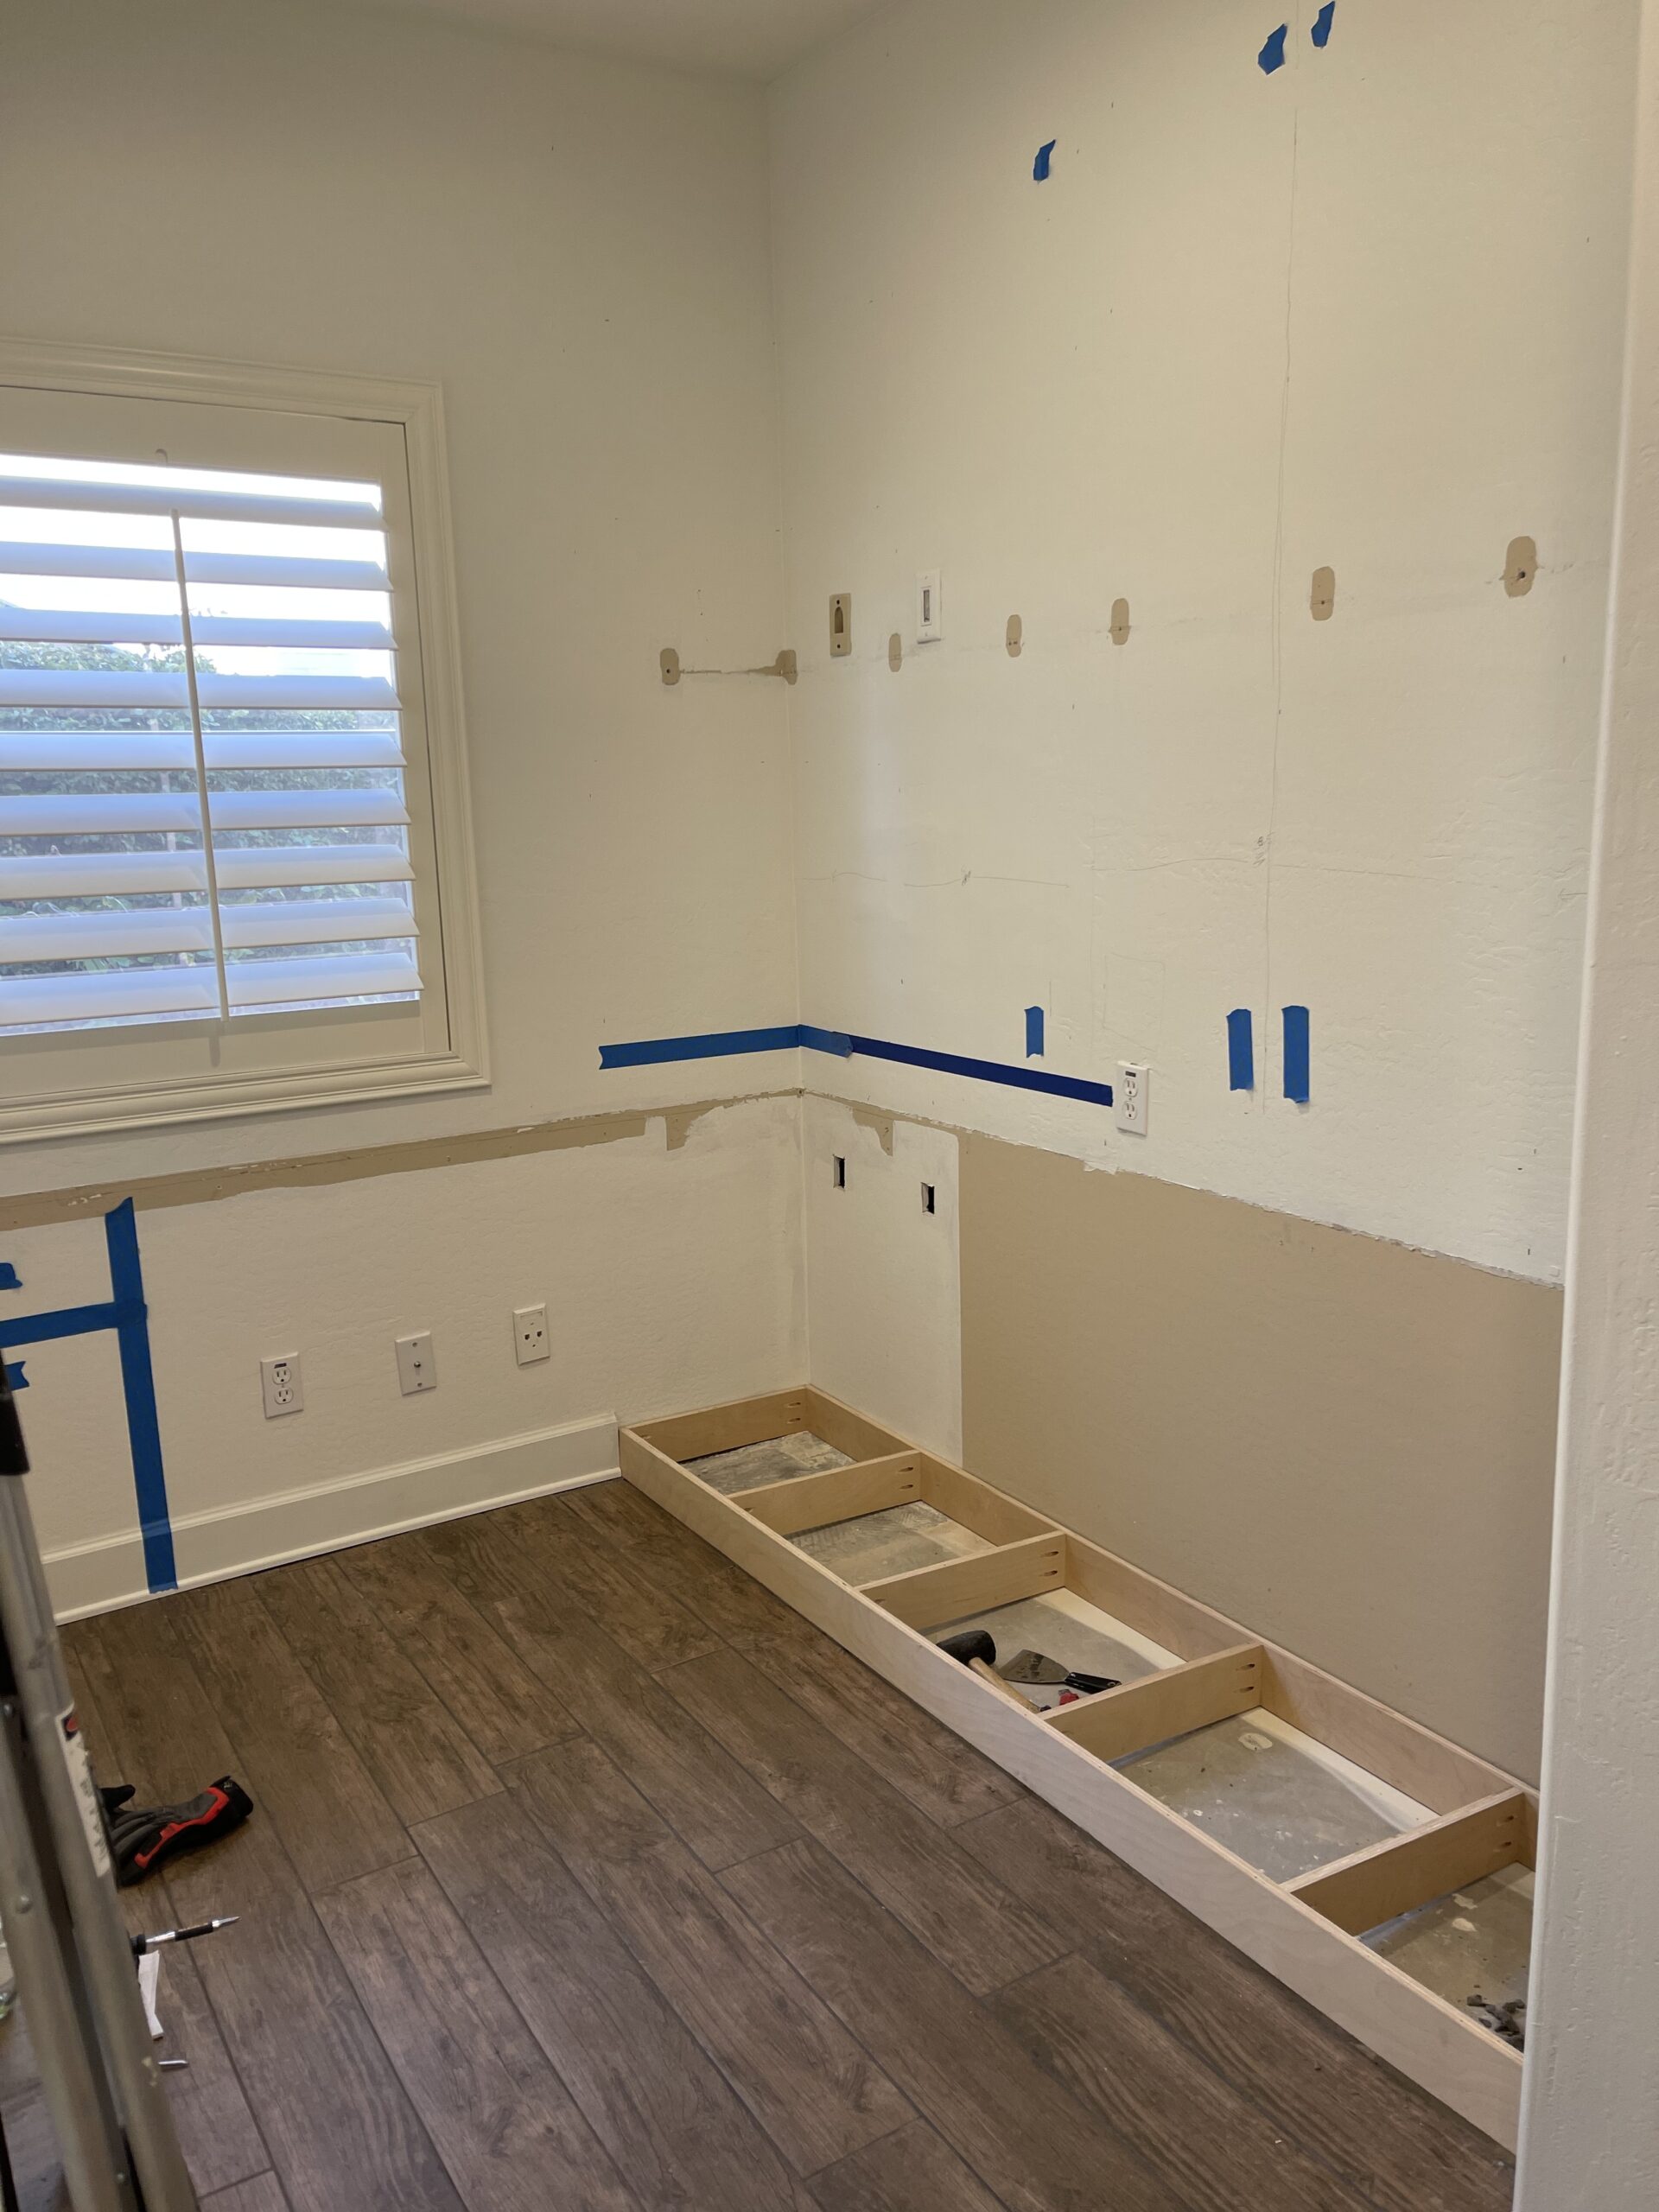
My plan with the base cabinets was to utilize the space for food storage. I made two large, deep drawers for the middle section that would sit under the appliance garage. On each side of the large drawers, I made cabinets with pull out shelves. The pull out shelves make the space so much more functional. On the far left, I made a cabinet that will pretty much be hidden but gives me extra storage space for season items.
Adding the countertop...
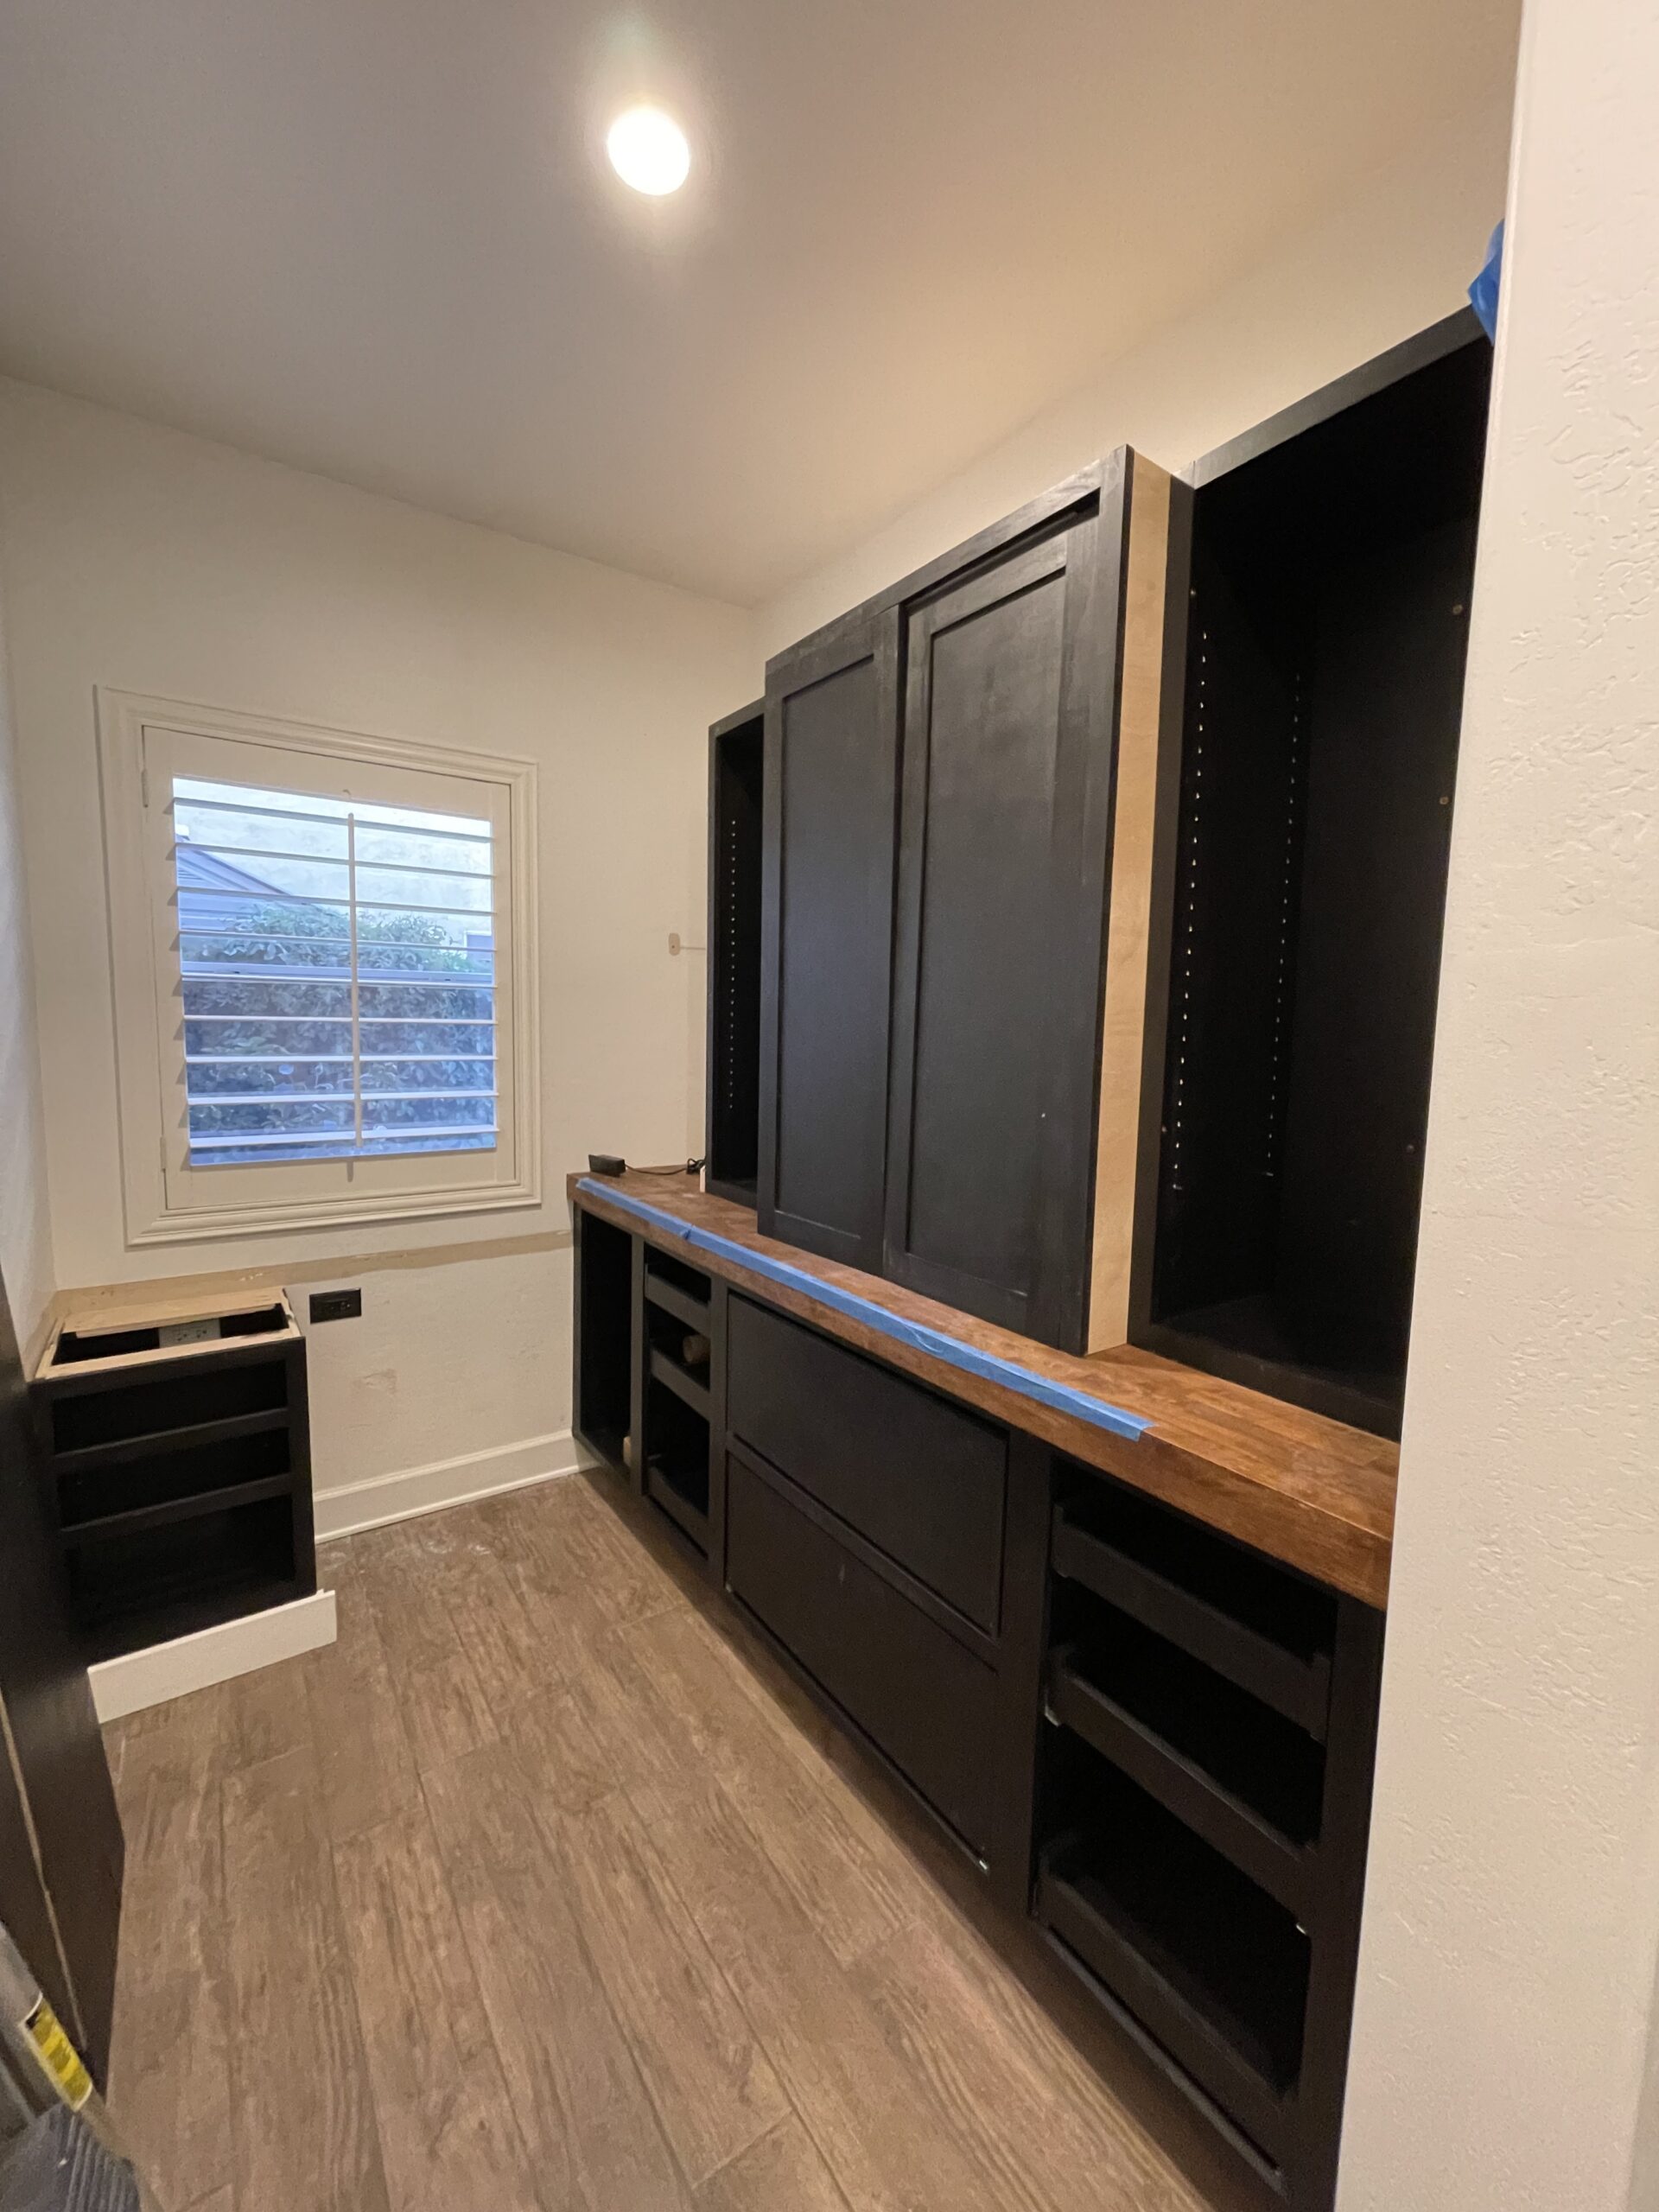
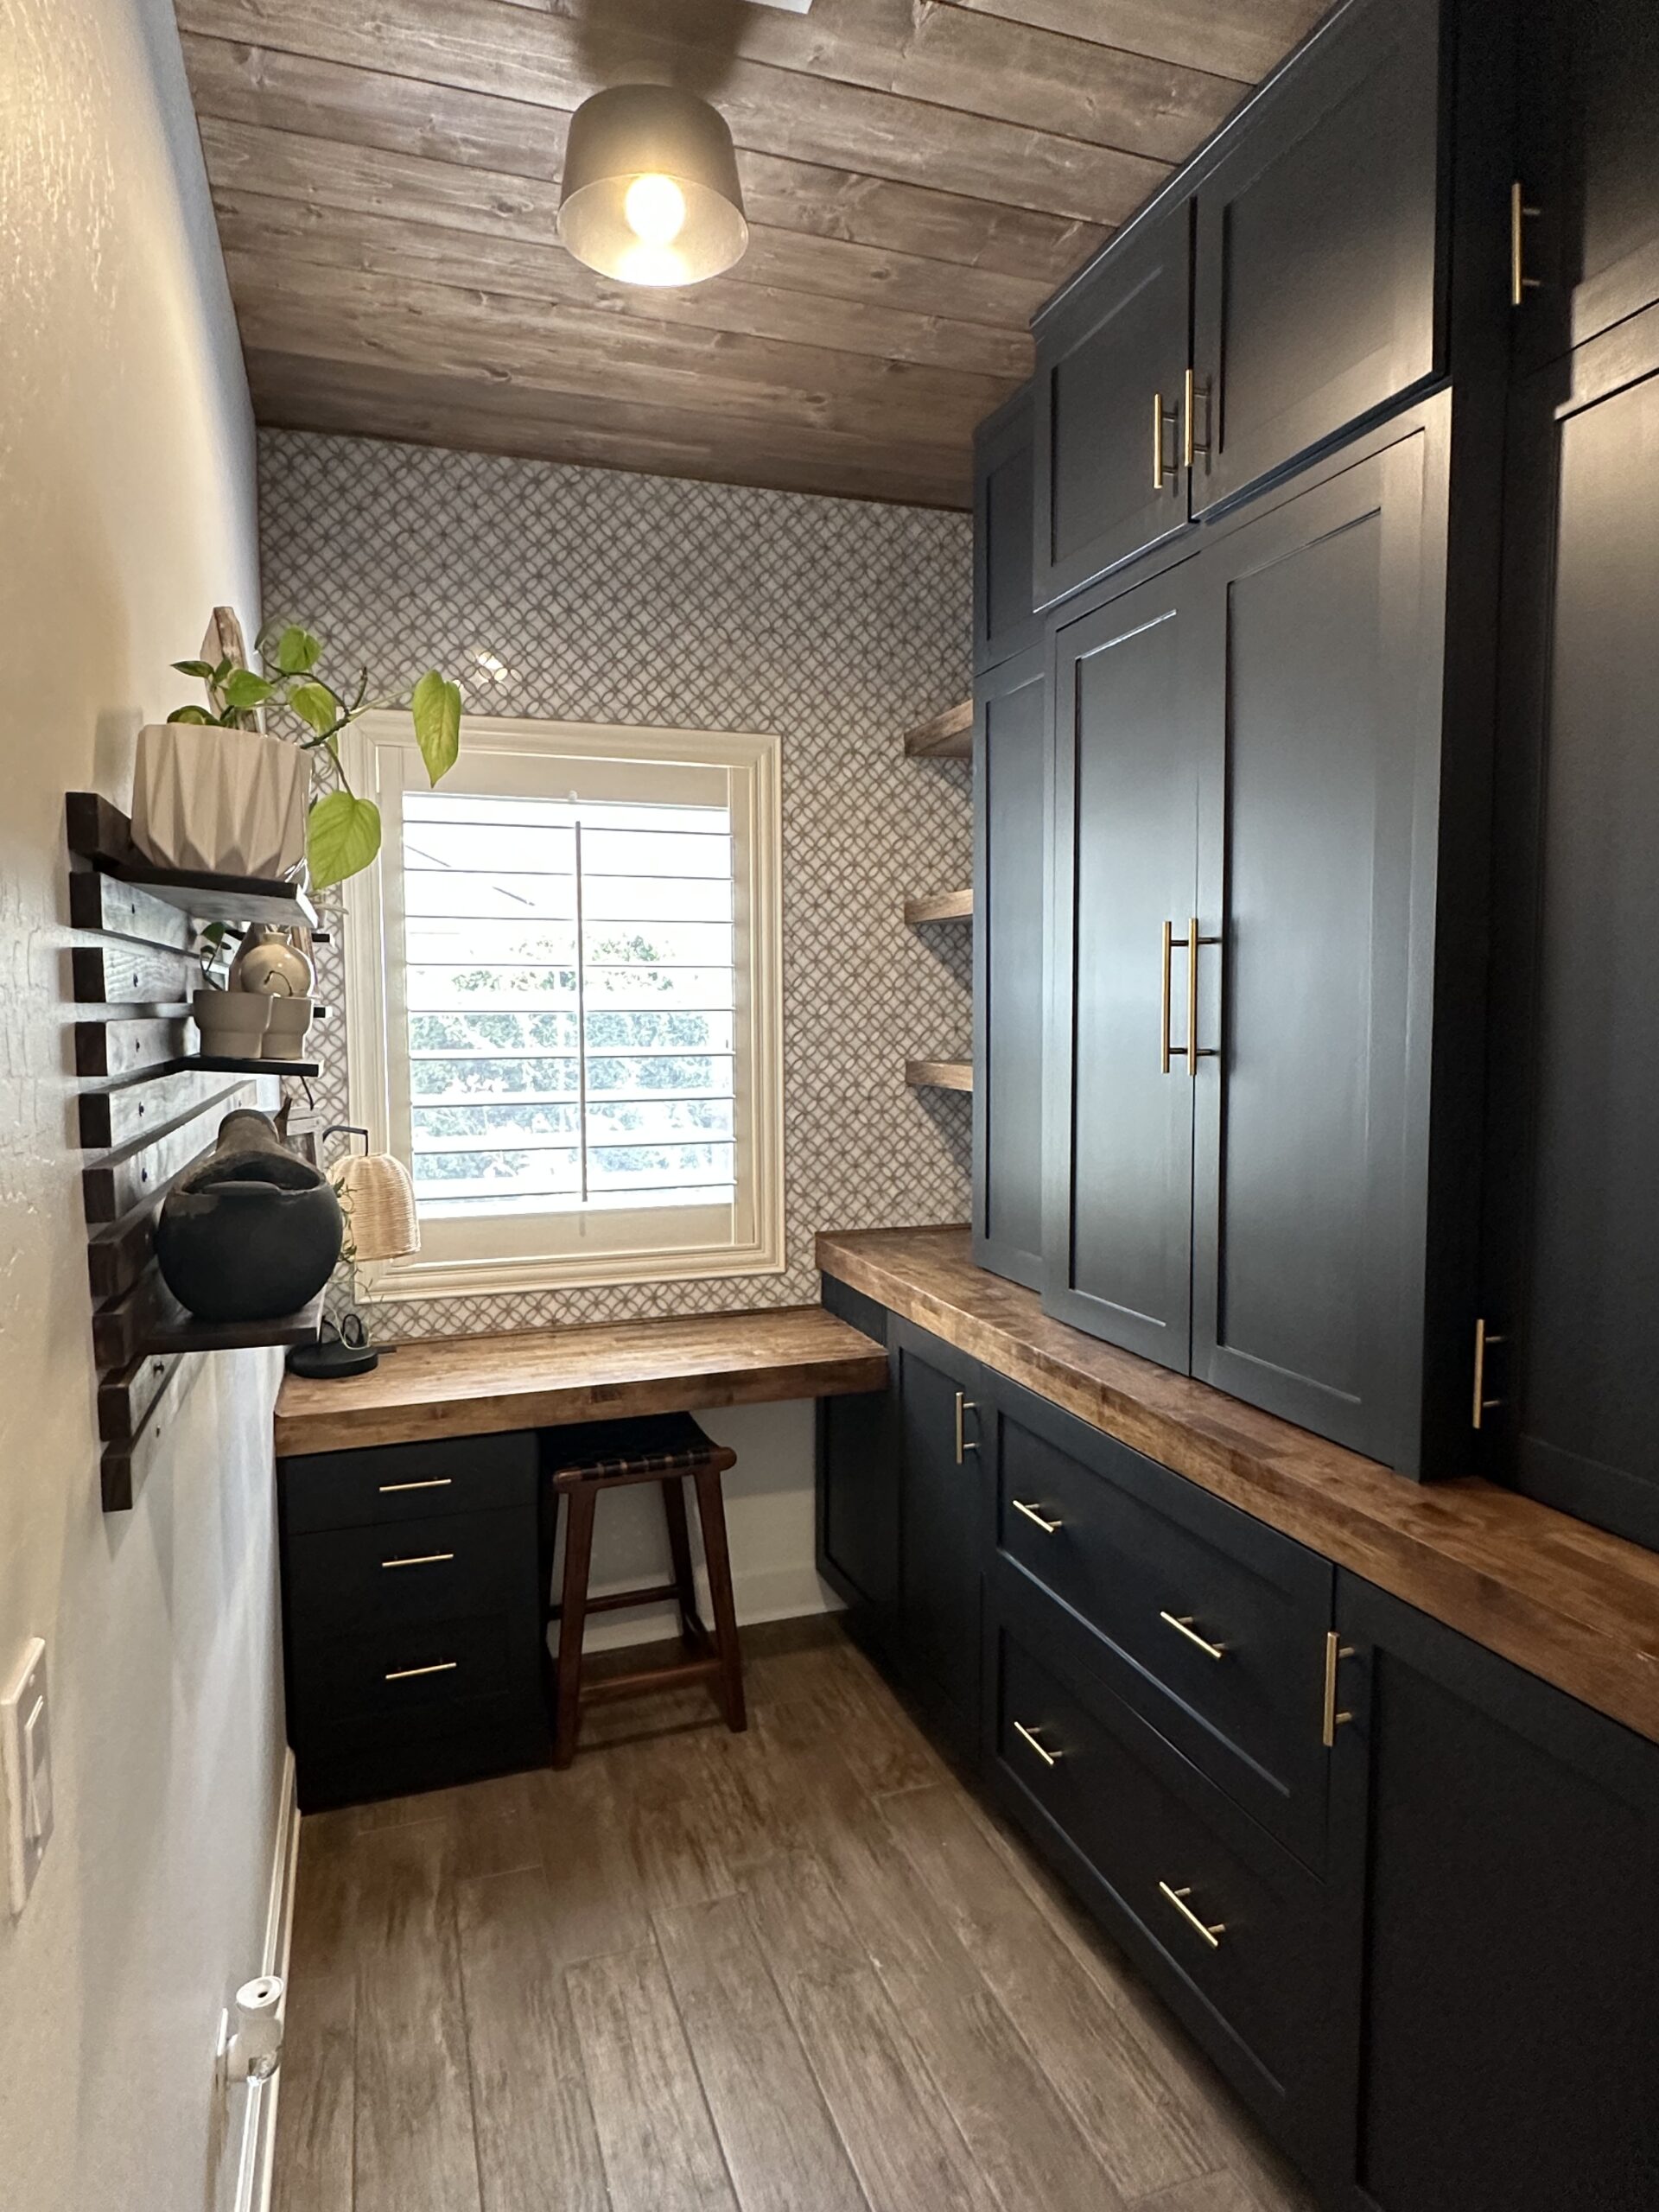
When I designed the appliance garage, I knew it would need to sit on some sort of countertop and I wanted room to be able to set a plate or other object in front. I decided that I would use a butcher block countertop. The edge of the countertop was too narrow for what I wanted so I miter cut one side and then reattached the piece I cut off to create this illusion of a thicker countertop. I went ahead and painted the cabinets and stained the countertop before putting the cabinets on top. We also moved the electric before installing the top cabinets so that I could have outlets inside the appliance garage.
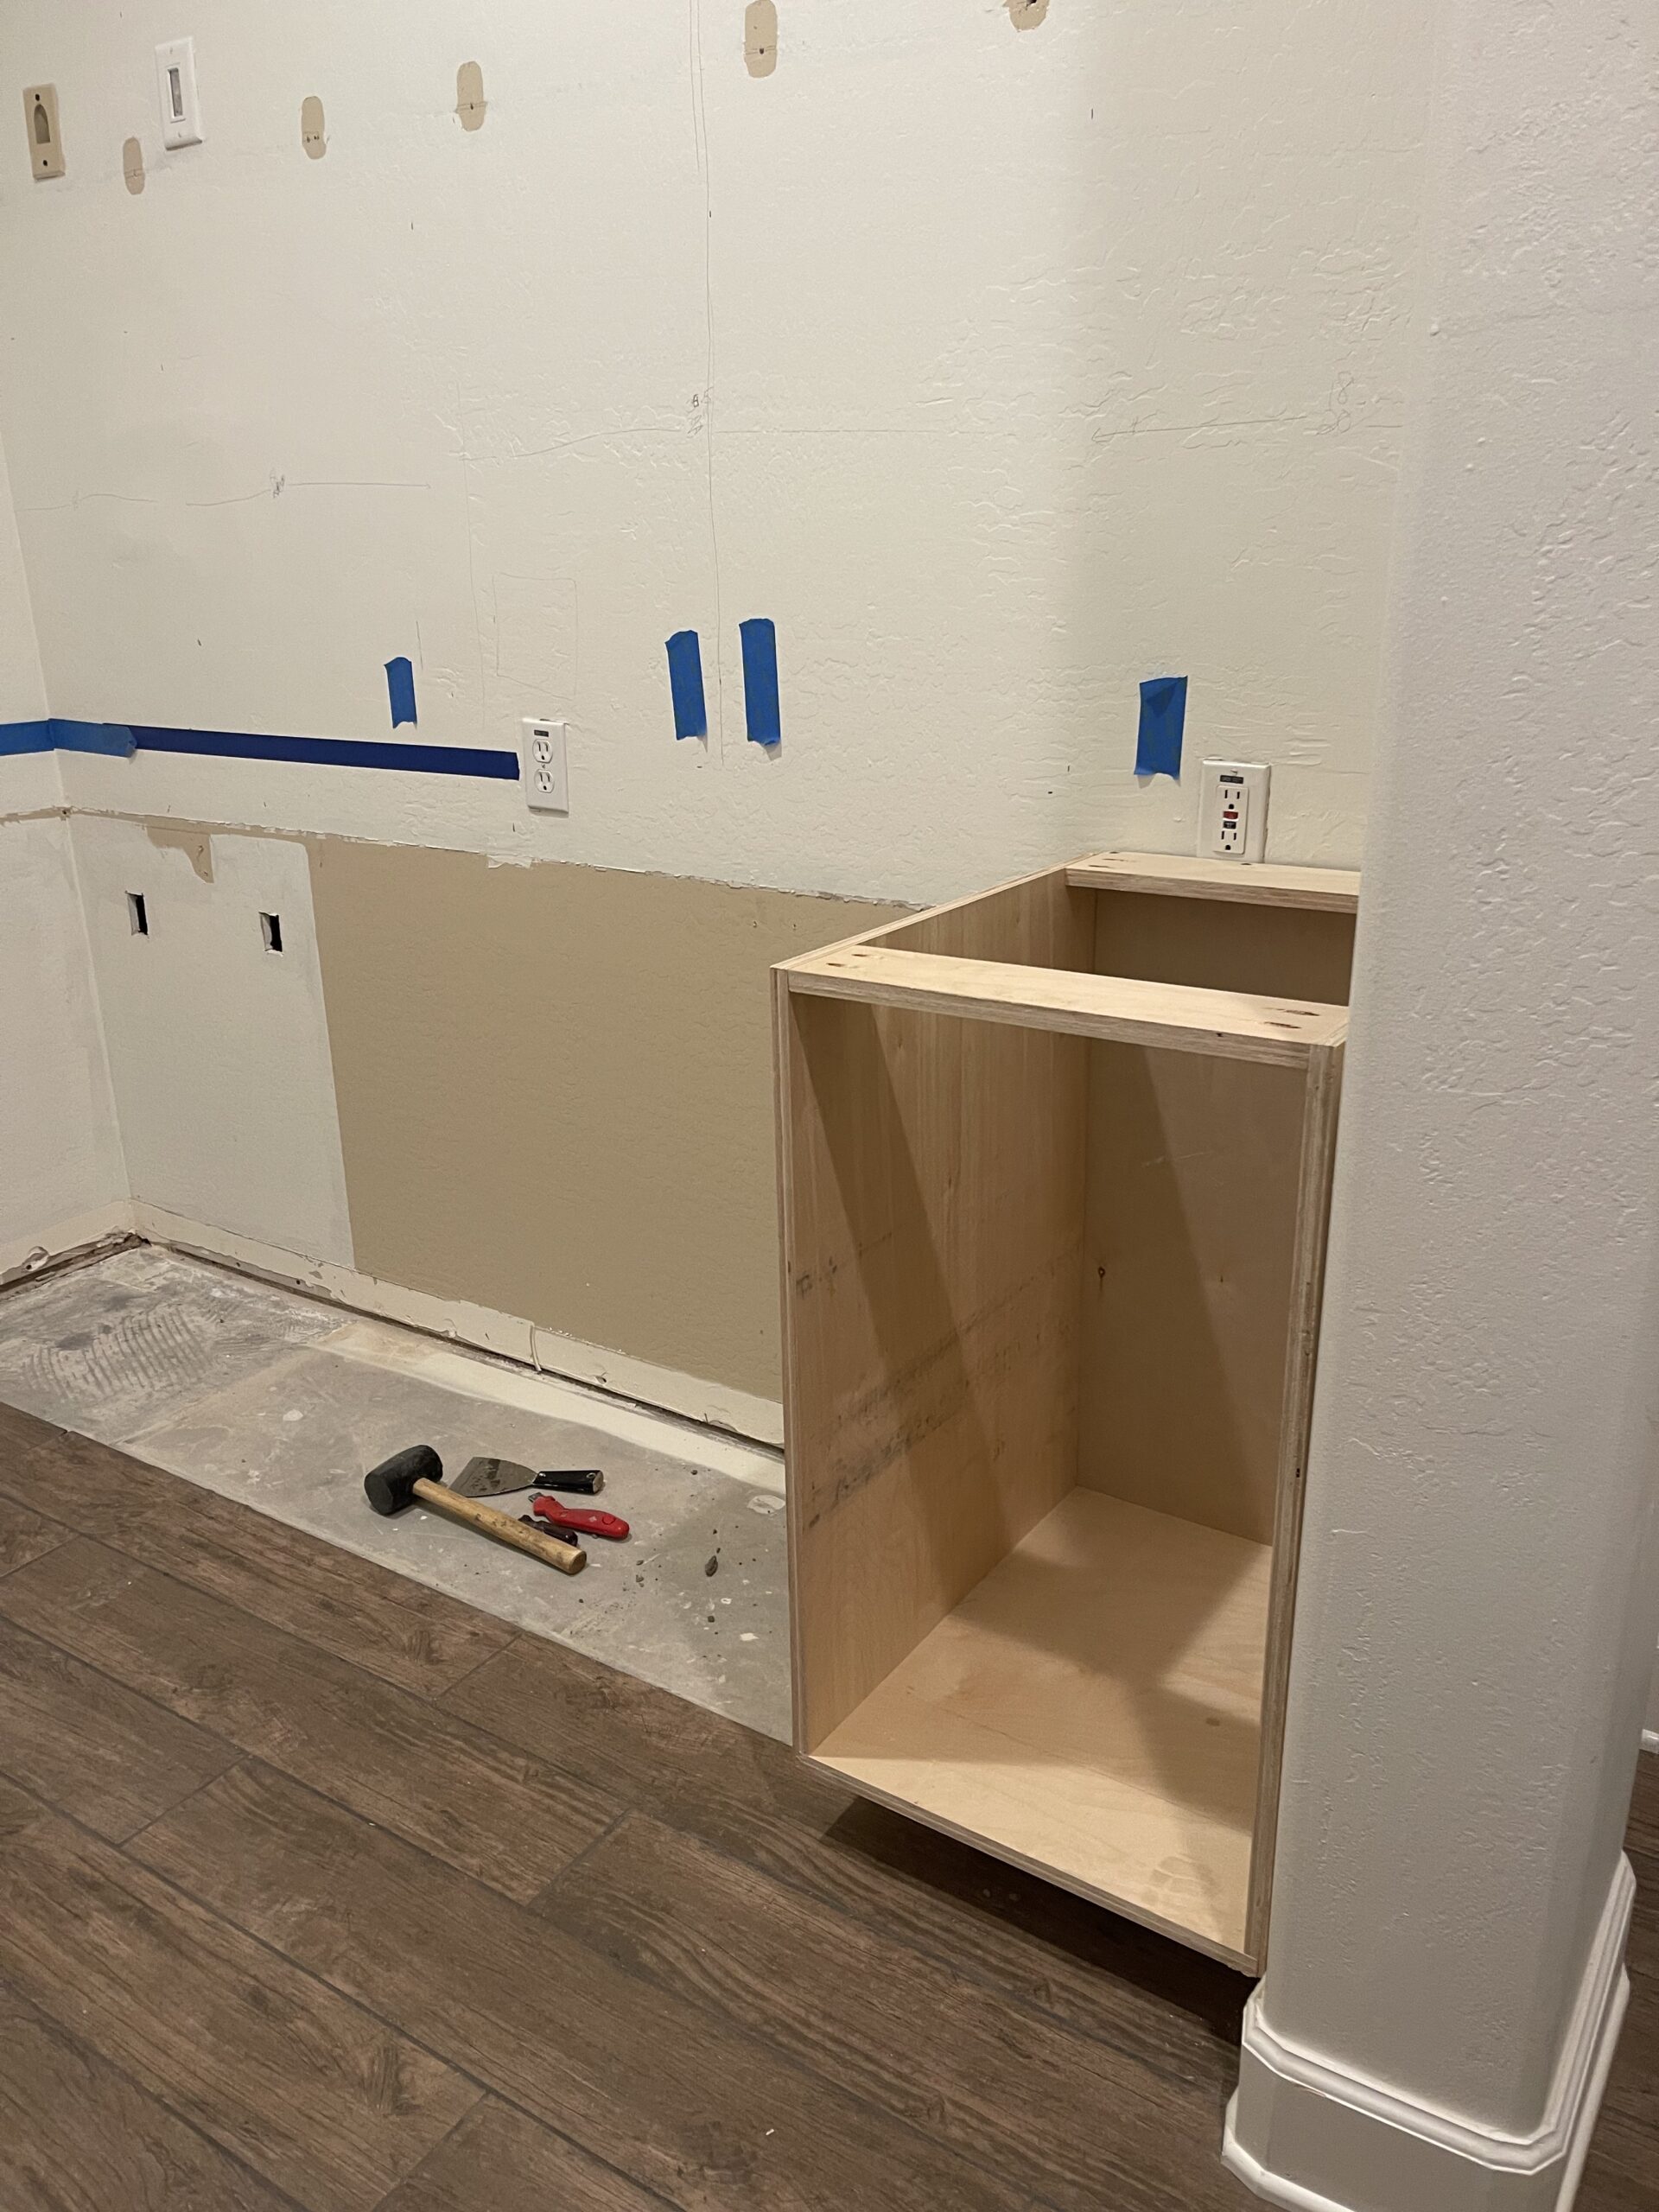
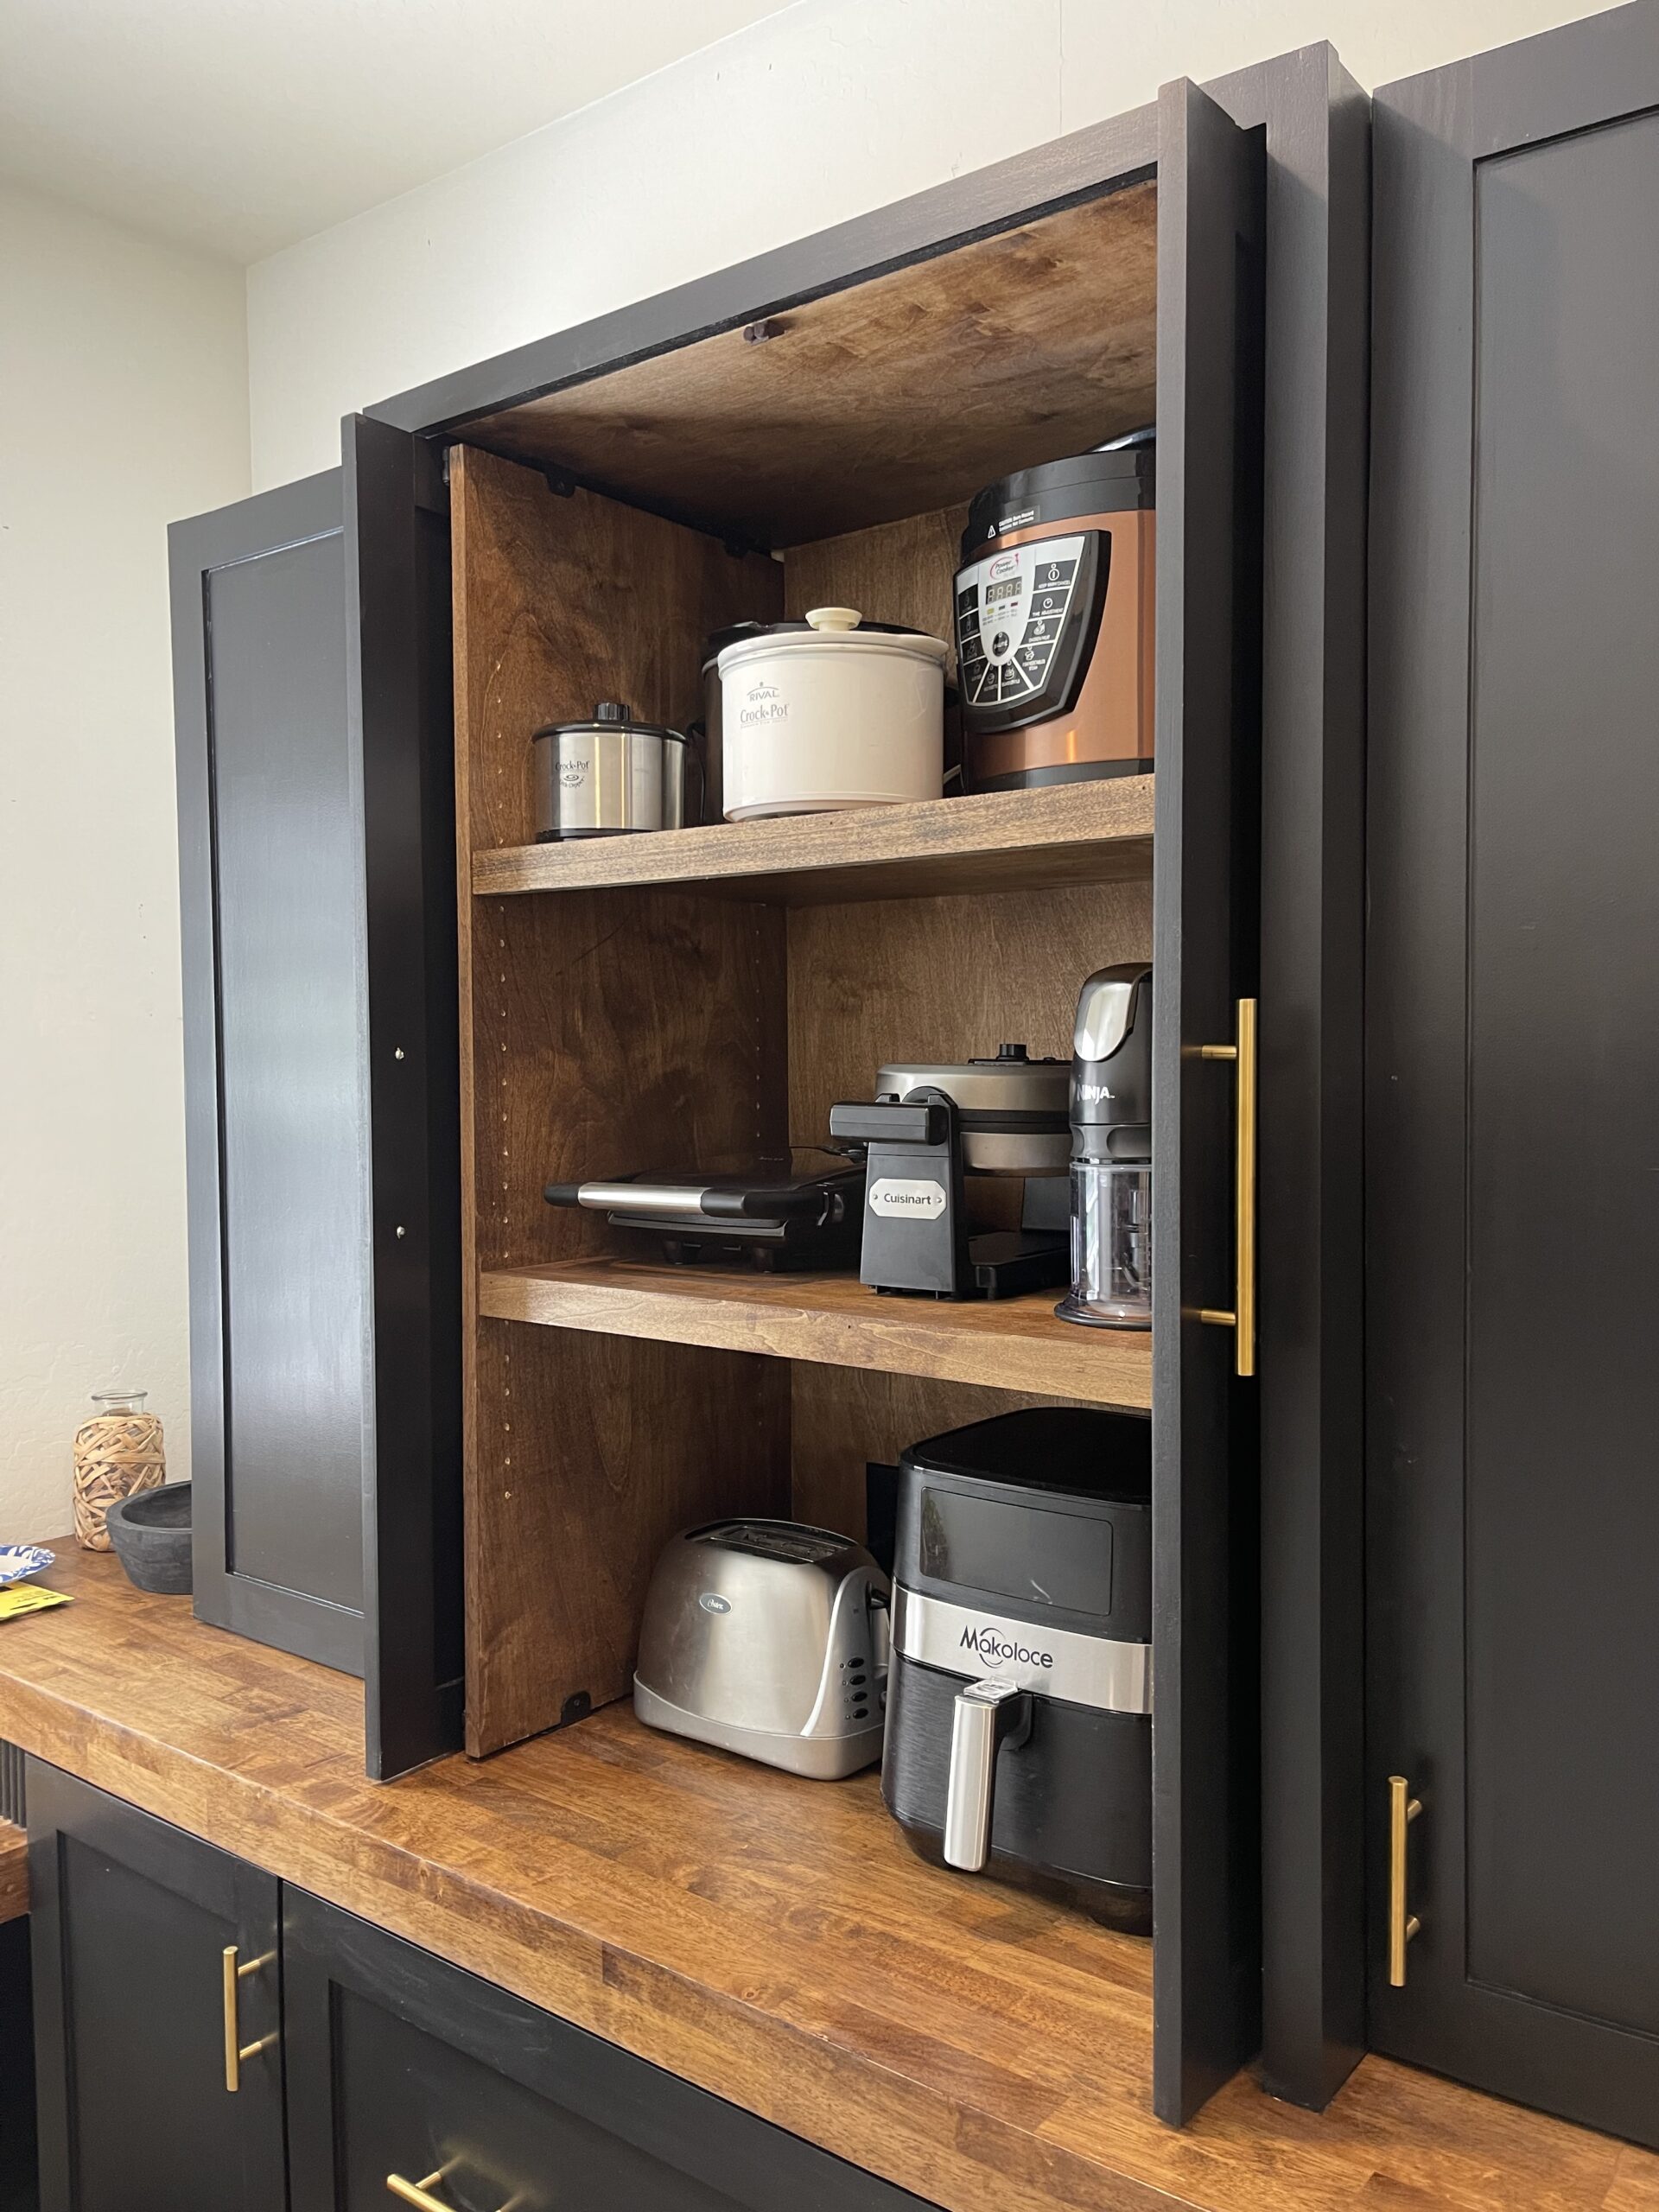
Let's talk about the appliance garage...
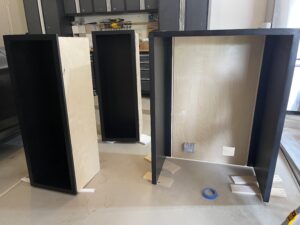
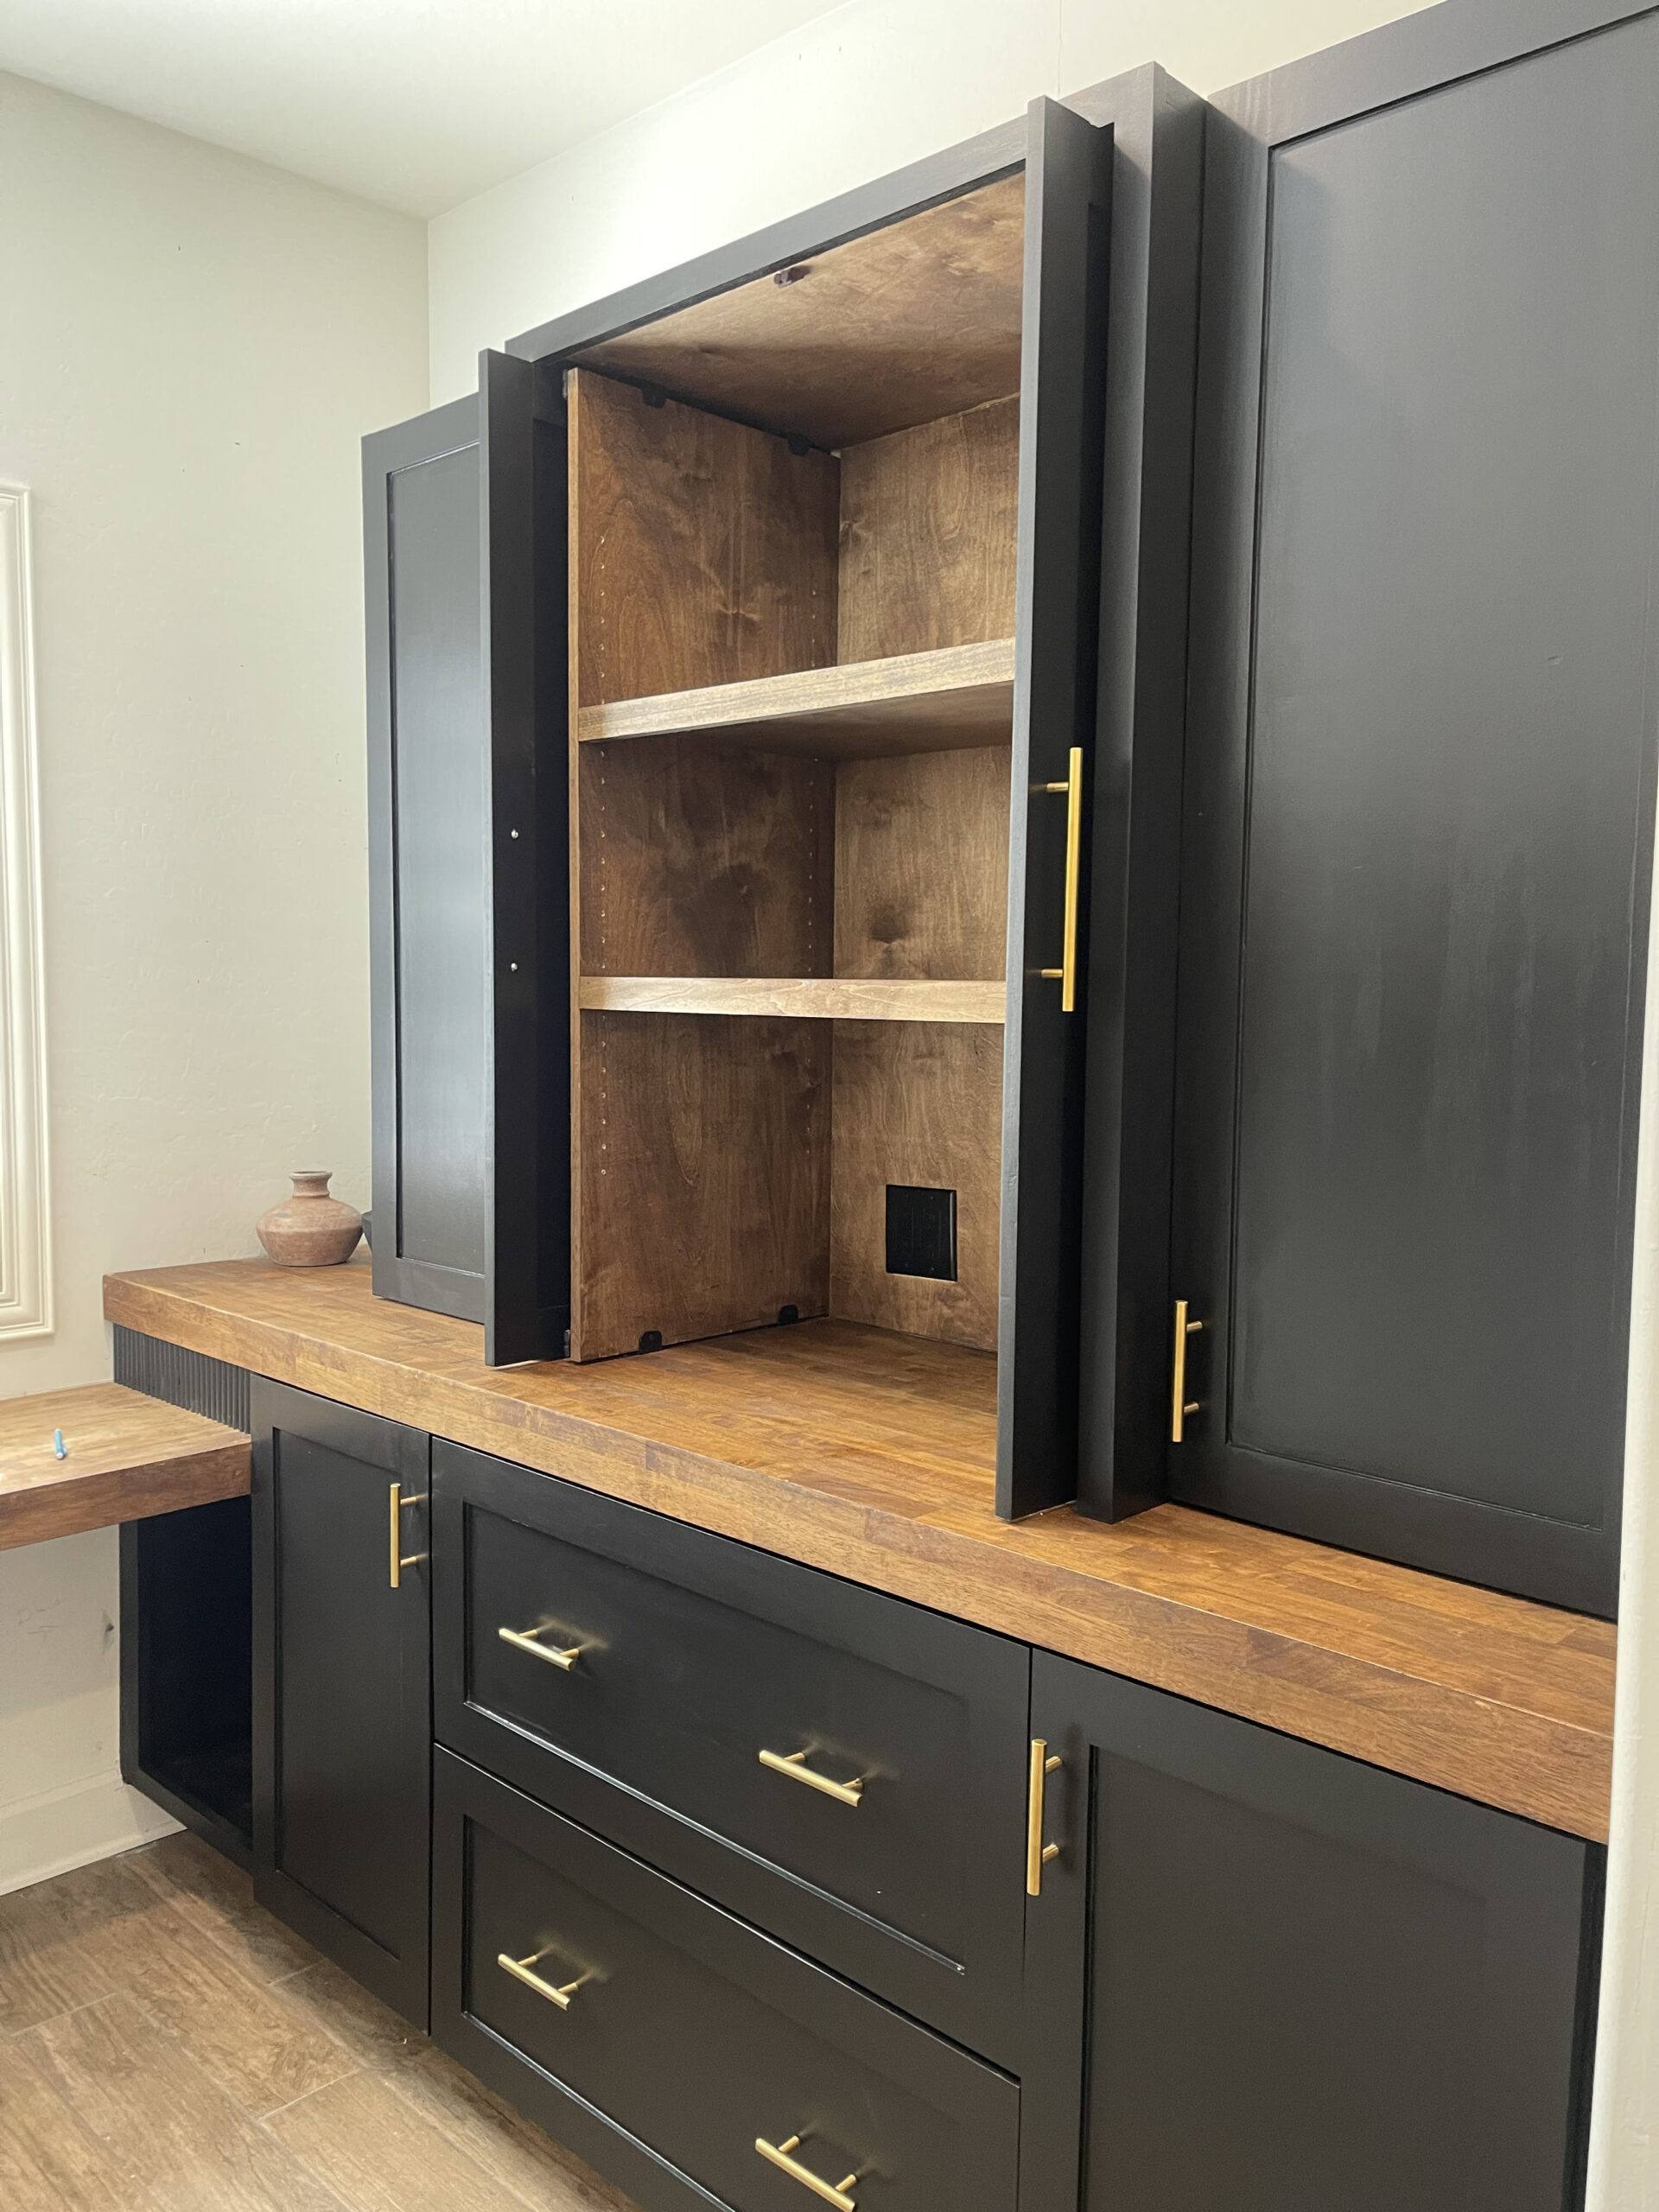
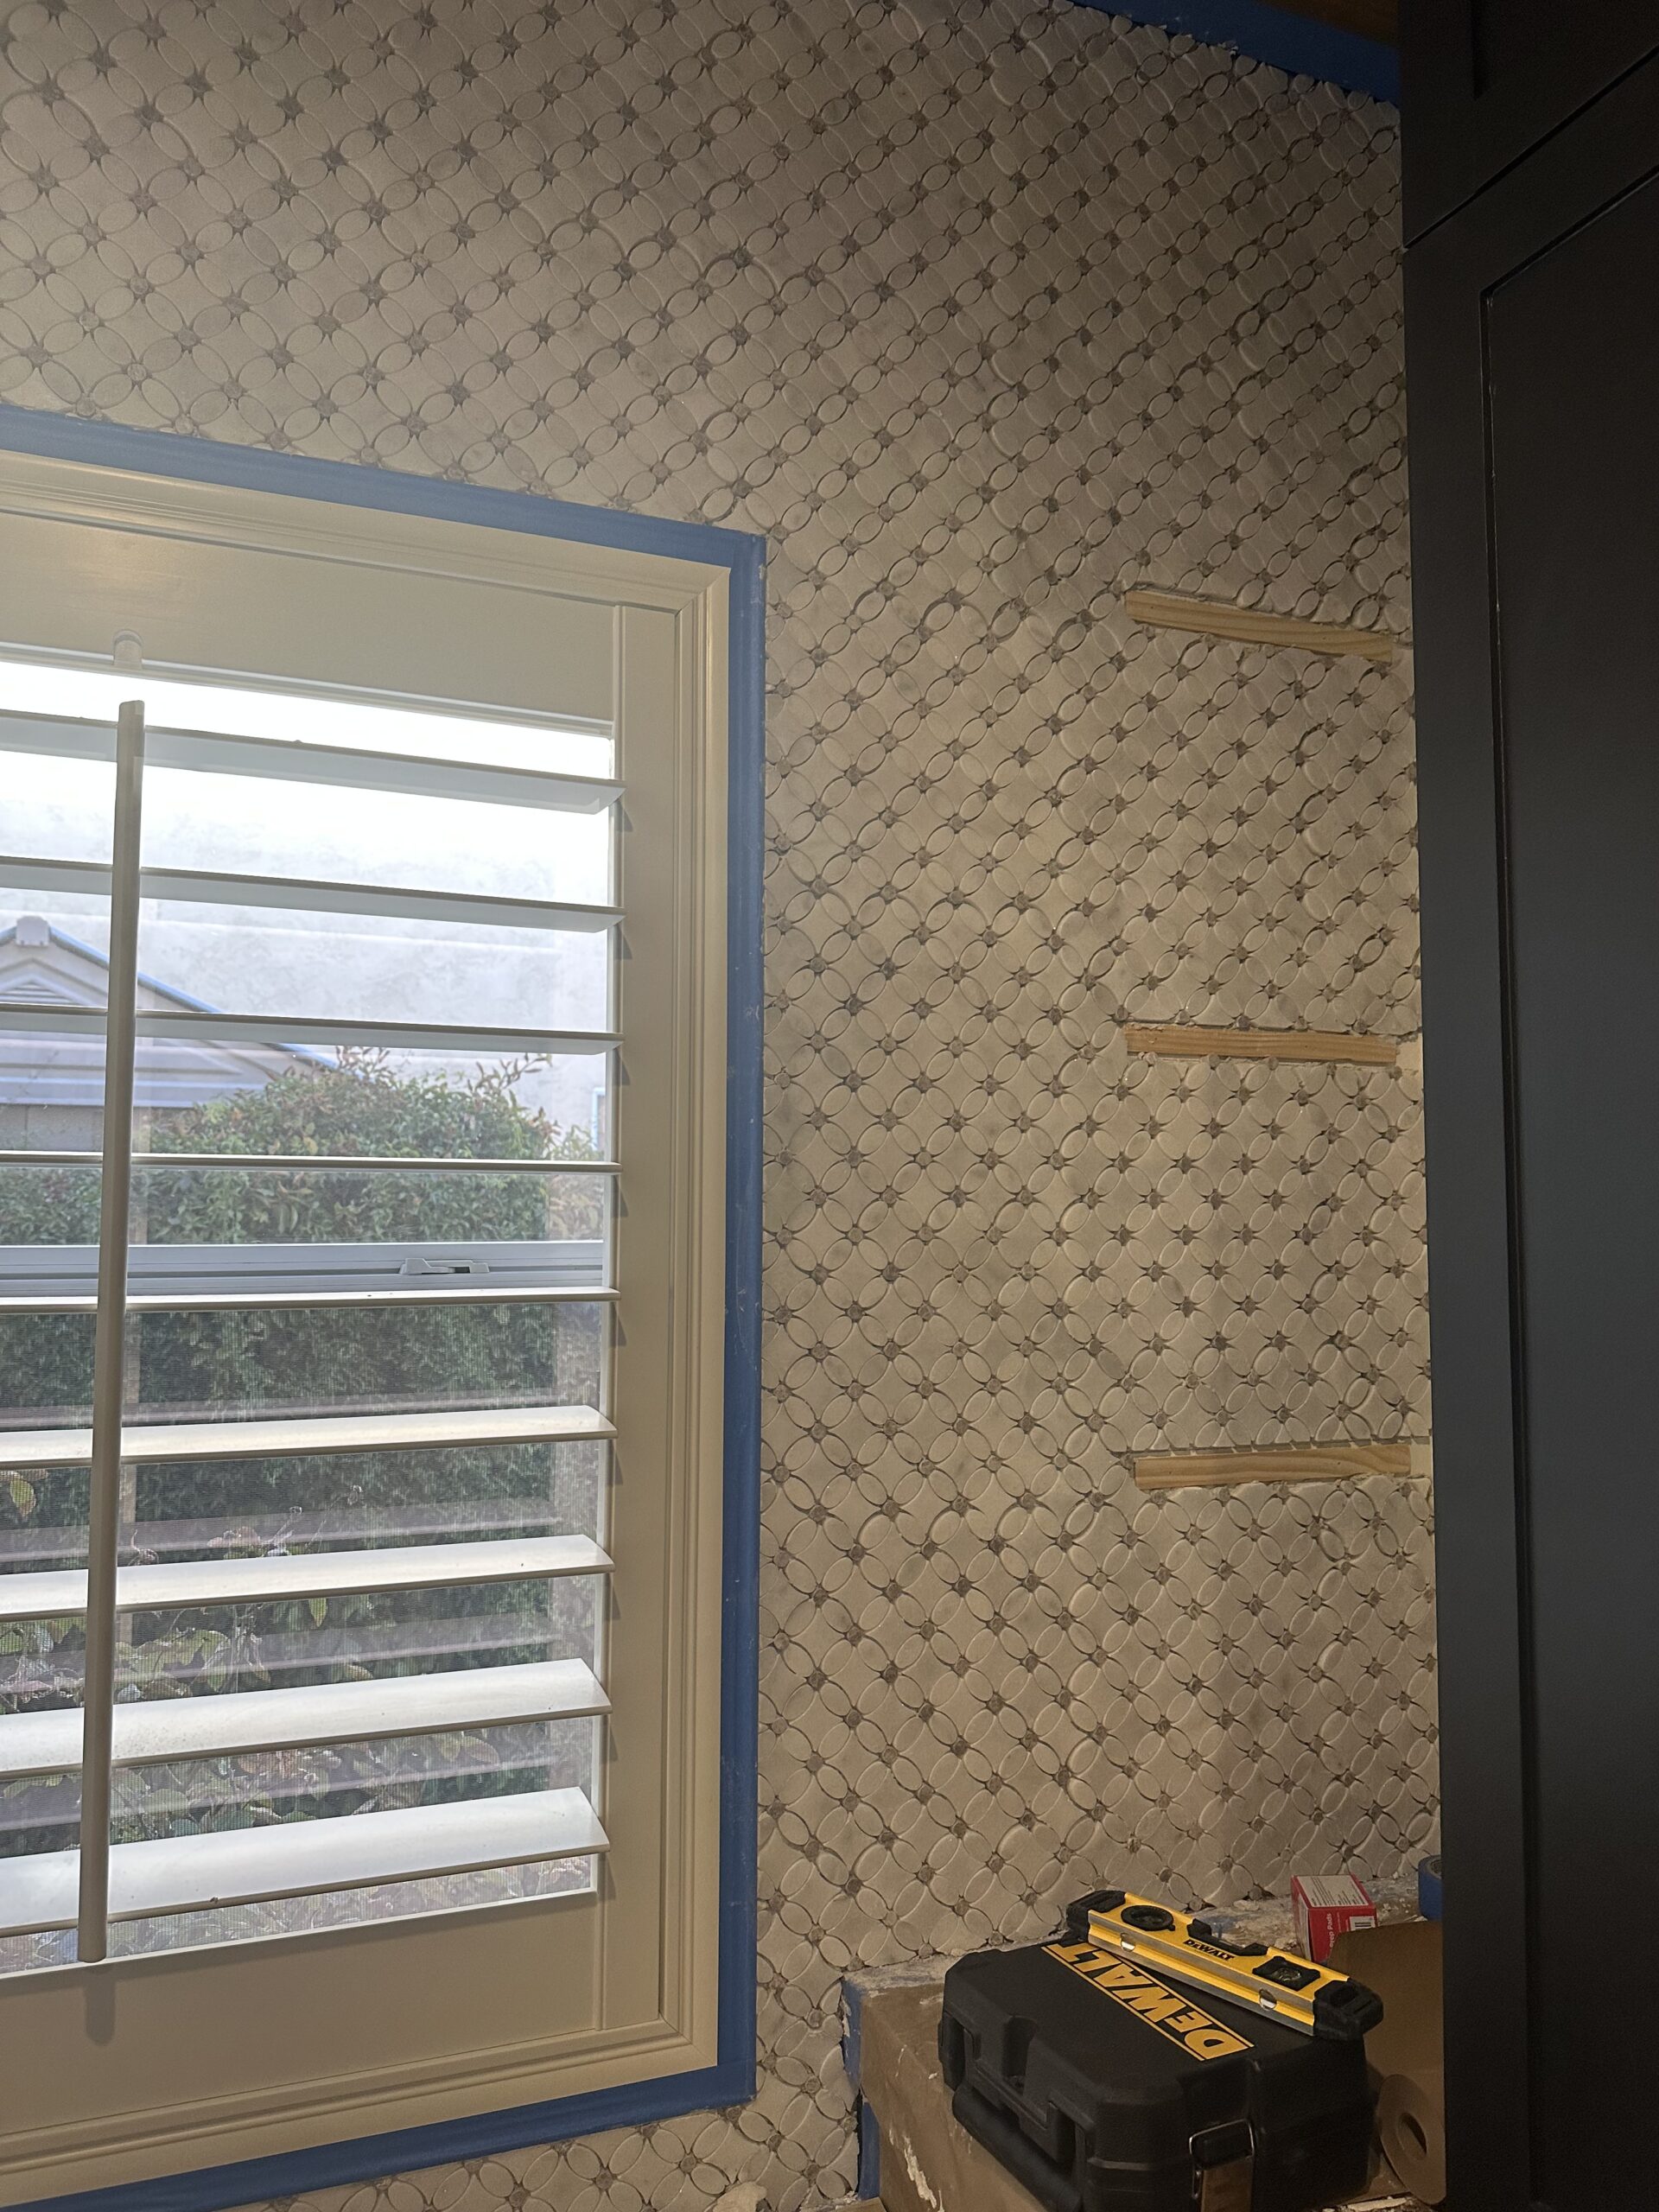
To make the appliance garage, I had to make a cabinet shell without a bottom so it would sit directly on the butcher block countertop. (You can see this step in the smaller photo below.) Once I had the main cabinet part put in place, I built a set a shelves that sit inside of it. This gave me room to use sliders between the cabinet and the shelves so that the doors could be pushed back and out of the way while using the appliances inside. The shelves are adjustable so I can move them to accommodate anything we put in this cabinet. I added a cabinet on each side. Those cabinets also have adjustable shelves.
It's all about the details...
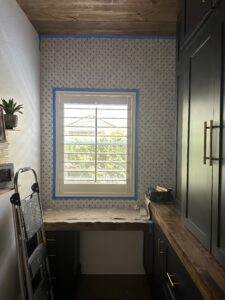
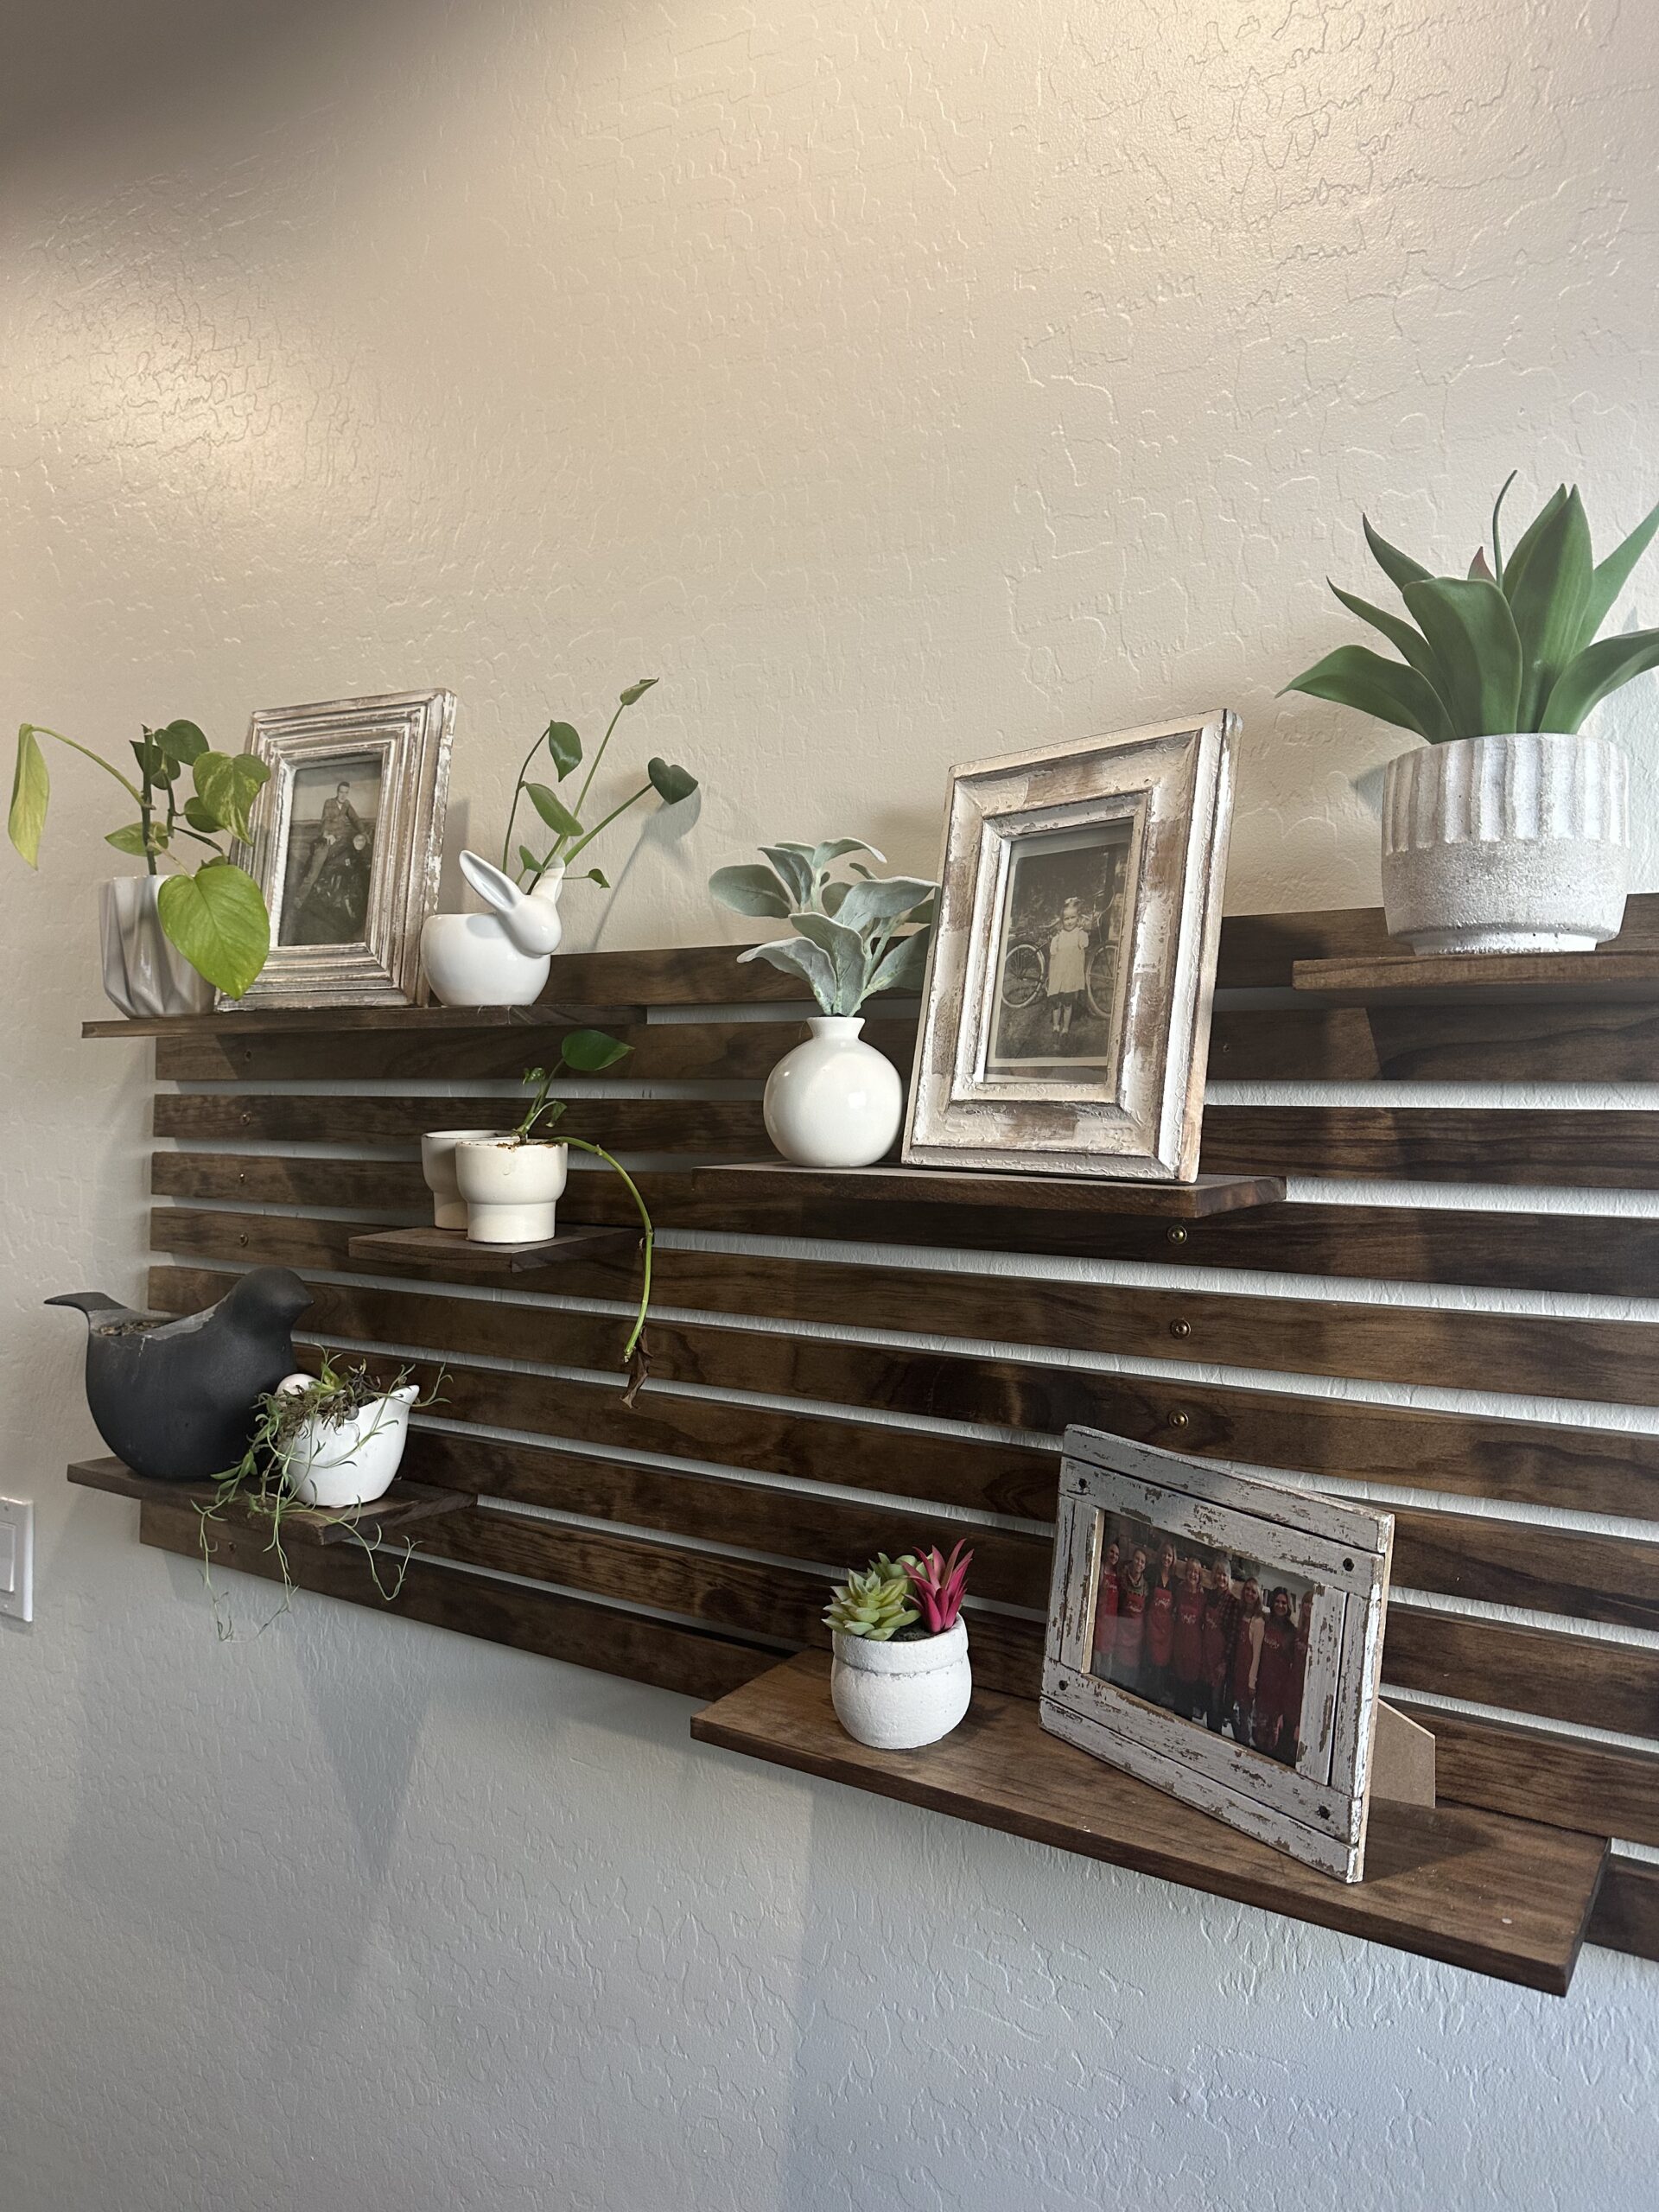
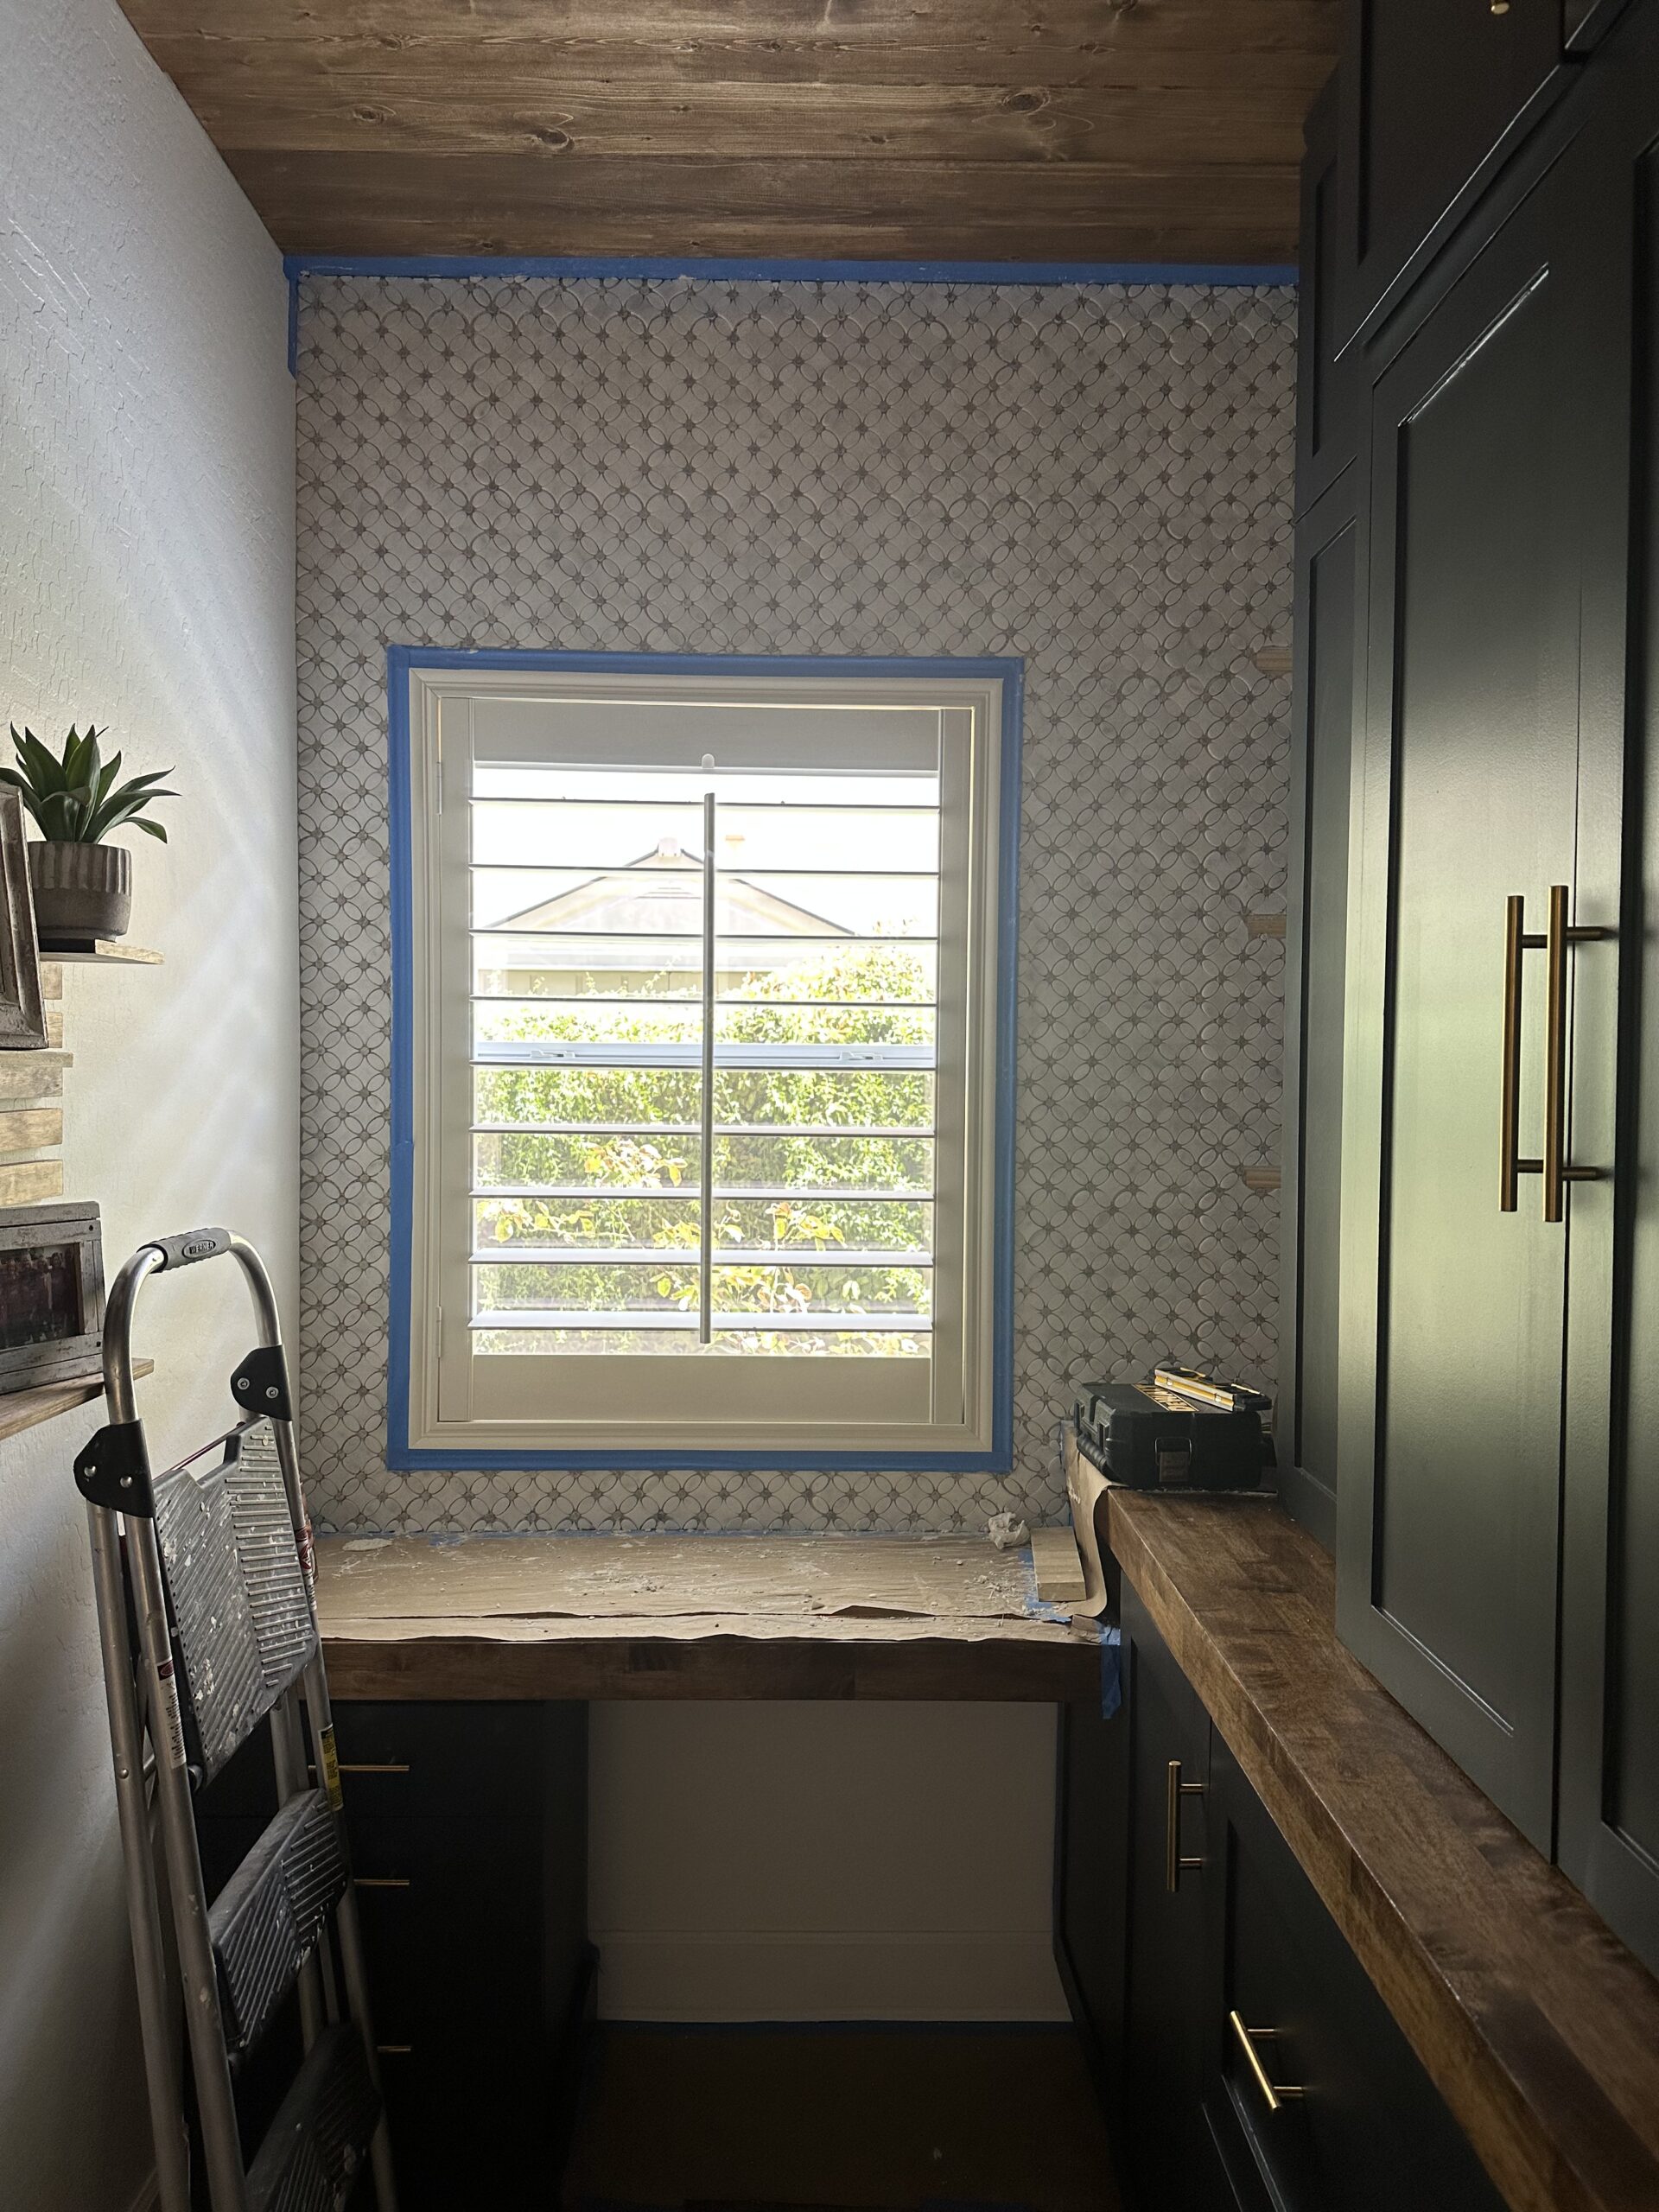
I added another row of cabinets on top, and a desk under the window to finish off all the cabinetry. I left the space on the end open for some floating shelves so I had a place for my plants. The wood ceiling added so much warmth to the space and the pendant lighting was a big upgrade from the can lights that were in this space. The tile wall was the final detail this space was missing.
Pantry Photo Gallery
Before and after photos as well as a look at the work as it was completed.